
You’ve unboxed your new Ninja Blender 3-in-1 and now face a countertop full of attachments with no idea where to start. Don’t worry – within 15 minutes, you’ll confidently switch between blending smoothies, processing vegetables, and making single-serve shakes. This guide cuts through the confusion to show exactly how to use ninja blender 3 in 1 like a pro, with no wasted time on unnecessary steps or confusing jargon.
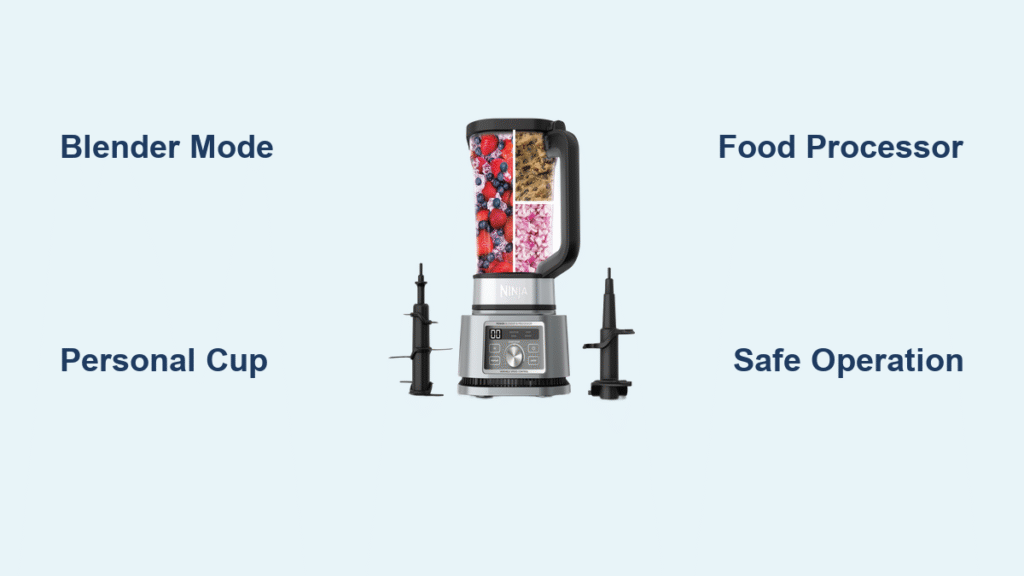
The beauty of this system lies in its three distinct modes controlled by simple attachment swaps. Unlike other blenders that force you to guess settings or struggle with complicated parts, the Ninja 3-in-1 clicks into place with clear indicators that you’ve got it right. Whether you’re making your morning smoothie in the personal cup or whipping up a week’s worth of chopped veggies in the food processor bowl, this guide delivers exactly what you need to know to get perfect results every time.
Identify Your 3-in-1 Components
Before pressing any buttons, correctly matching each piece to its function eliminates 90% of beginner frustration. The Ninja 3-in-1 system transforms with three distinct attachments that convert your single base into three kitchen powerhouses.
Blender Pitcher Assembly
Your 72-ounce pitcher works as a traditional countertop blender with the Total Crushing® blade stack containing six razor-sharp blades arranged vertically. To attach correctly: place stacked blades in pitcher base, add ingredients up to the max fill line, secure the lid by aligning arrows, then twist the pitcher onto the base until you hear a distinct click and see the “LOCK” indicator light. No light means no blending – this safety feature prevents accidental operation.
Personal Blender Cups
These 16-24 ounce single-serve cups convert your base into a personal smoothie maker. The Pro Extractor Blades® screw directly onto each cup, spinning at 21,000 RPM to pulverize seeds and stems that other blenders miss. Each cup comes with Sip & Seal® lids for true grab-and-go convenience. To use: fill cup with ingredients (liquids first!), screw on blade assembly tightly, invert onto base, and twist clockwise until secure.
Food Processor Bowl
The 64-ounce processor bowl clicks into place like the pitcher but serves entirely different functions. Inside, you’ll swap between the chopping blade for vegetables and the dough blade (plastic, dull edges) for bread-making. The feed chute and pusher allow continuous processing of cheese, vegetables, or fruits without stopping. Always insert the appropriate blade first, add ingredients in 1-inch pieces, then secure the lid with safety lock engaged.
Quick Assembly Checklist
First-Time Setup (5 Minutes)
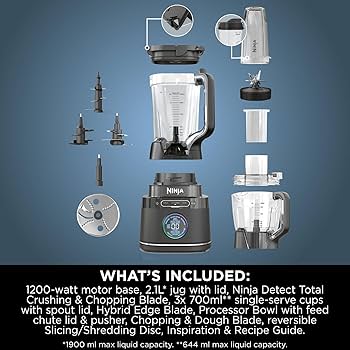
- Unbox and inspect all components against the included parts list – verify you have the pitcher, personal cups, processor bowl, and all blade assemblies
- Wash everything (except the motor base) in warm, soapy water before first use
- Practice dry assembly of each attachment to feel the correct locking mechanism
- Position on counter with 6 inches clearance on all sides for ventilation
Daily Attachment Swapping (30 Seconds Each)
- Blender mode: Place stacked blades in pitcher → add ingredients → lock lid → twist onto base until “LOCK” appears
- Personal mode: Fill cup → screw on blade assembly → invert onto base → twist to engage
- Processor mode: Insert appropriate blade → add ingredients → lock lid → attach to base with firm twist
Master Each Operating Mode
Blender Mode Mastery
Ice Crushing Technique That Works
Never dump ice directly into an empty pitcher. Instead:
– Add 1 cup liquid minimum to 72oz pitcher
– Layer ice on top (max 2 cups)
– Pulse 3-5 times before continuous blending
– Use “Frozen Drink” preset for perfect consistency
Hot Liquid Safety Protocol
Hot soup blending requires special attention:
– Cool 5 minutes before blending
– Remove center cap from lid
– Cover opening with folded towel
– Start low, increase gradually to prevent pressure explosions
Personal Blender Perfection
Single-Serve Success Order
Layer ingredients strategically for smooth results:
1. Liquids first (milk, juice, water)
2. Soft ingredients (yogurt, fresh fruit)
3. Frozen items
4. Powders and seeds last
Nutrient Extraction Secrets
Fill your single-serve cup with 1-2 cups liquid base, then pack fruits and vegetables to the “max” line. Never overpack – this protects your motor. The “Extract” preset optimizes blade patterns for maximum nutrition release from seeds and skins.
Food Processor Expertise
Perfect Chopping Every Time
- Cut vegetables into 1-inch pieces first
- Use 1-second pulses for control
- Check frequently – over-processing happens fast
- For herbs, use 3-5 pulses maximum
Foolproof Dough Making
- Insert dough blade (plastic, dull edges)
- Add dry ingredients, pulse 3-4 times
- Pour wet ingredients through feed chute while processing
- Process until ball forms and cleans bowl sides
Solve Common Operation Issues
When Nothing Happens
Check these three things first:
1. “LOCK” indicator visible? If not, twist attachment clockwise
2. Lid secure? Should click into place
3. Reset needed? Unplug 30 seconds, try again
Leaking During Operation
Quick fixes:
– Check blade assembly gasket for damage
– Don’t exceed max fill lines
– Ensure lid alignment – arrows must match
– Replace blade assembly if seal looks worn
Overheating Problems
Immediate solutions:
– Process smaller batches
– Add more liquid to reduce strain
– 30-minute cooldown between heavy uses
Pro-Level Performance Tips

Ingredient Preparation Secrets
- Freeze fruits in single layers on trays before bagging for easier blending
- Pre-soak nuts 4+ hours for silky nut butters
- Cut everything to 1-inch pieces for even processing
- Steam vegetables first for baby food smoothness
Texture Control Mastery
- Chunky salsa: 3-5 pulses maximum
- Silky purees: 60-90 seconds continuous
- Creamy nut butters: 2-3 minutes with scraping
- Fluffy egg whites: 10-15 gentle pulses
Safety Protocols That Matter
Blade Handling Rules
- Grasp by plastic hub only – never touch sharp edges
- Store in protective sleeves when not attached
- Wait for complete stop before removing lids
- Use bottle brushes for safe cleaning
Electrical Safety Essentials
- Keep base dry – wipe spills immediately
- Unplug before switching attachments
- Check cord damage before each use
- Use grounded outlets only
Maintain Peak Performance
Daily Cleaning (2 Minutes)
- Rinse immediately after use
- Disassemble completely
- Wash in warm, soapy water
- Dry thoroughly before storage
- Wipe base with damp cloth only
Blade Replacement Timeline
Replace blade assemblies every 1-2 years with heavy use, or when you notice decreased performance. Never attempt sharpening – replacement ensures safety and performance.
Level-Up Techniques
Layered Drink Mastery
Create Instagram-worthy drinks by varying ingredient density:
1. Blend each layer separately
2. Start with heaviest (yogurt-based)
3. Pour gently over spoon back
4. Finish with lightest (juice-based)
Frozen Dessert Creation
Transform frozen fruit into instant sorbet:
– Process 2 cups frozen fruit with minimal liquid
– Add 1-2 tablespoons honey for sweetness
– Serve immediately or freeze 30 minutes for firmer texture
Your Next Steps
Start tomorrow with a simple smoothie using the personal blender cup – follow the ingredient layering order for perfect results. Once comfortable, graduate to the food processor for weekend meal prep. Within a week, you’ll wonder how you ever managed without this versatile system.
Remember: every expert was once a beginner. Your Ninja 3-in-1 will become your kitchen’s most valuable player – start blending, keep experimenting, and enjoy the endless possibilities. The key to mastering how to use ninja blender 3 in 1 is simply understanding which attachment creates which result, then following the specific techniques for each mode. With these clear instructions, you’re no longer confused – you’re equipped.


