

Tired of sore arms and sticky countertops from hand-kneading dough? The Ninja dough blade turns your food processor into a professional dough-making machine, delivering consistent results in minutes instead of hours. This specialized attachment handles everything from elastic pizza dough to flaky pastry with minimal effort, transforming your baking experience from chore to joy. Whether you’re a beginner baker or upgrading from traditional methods, mastering this tool will revolutionize your kitchen routine.
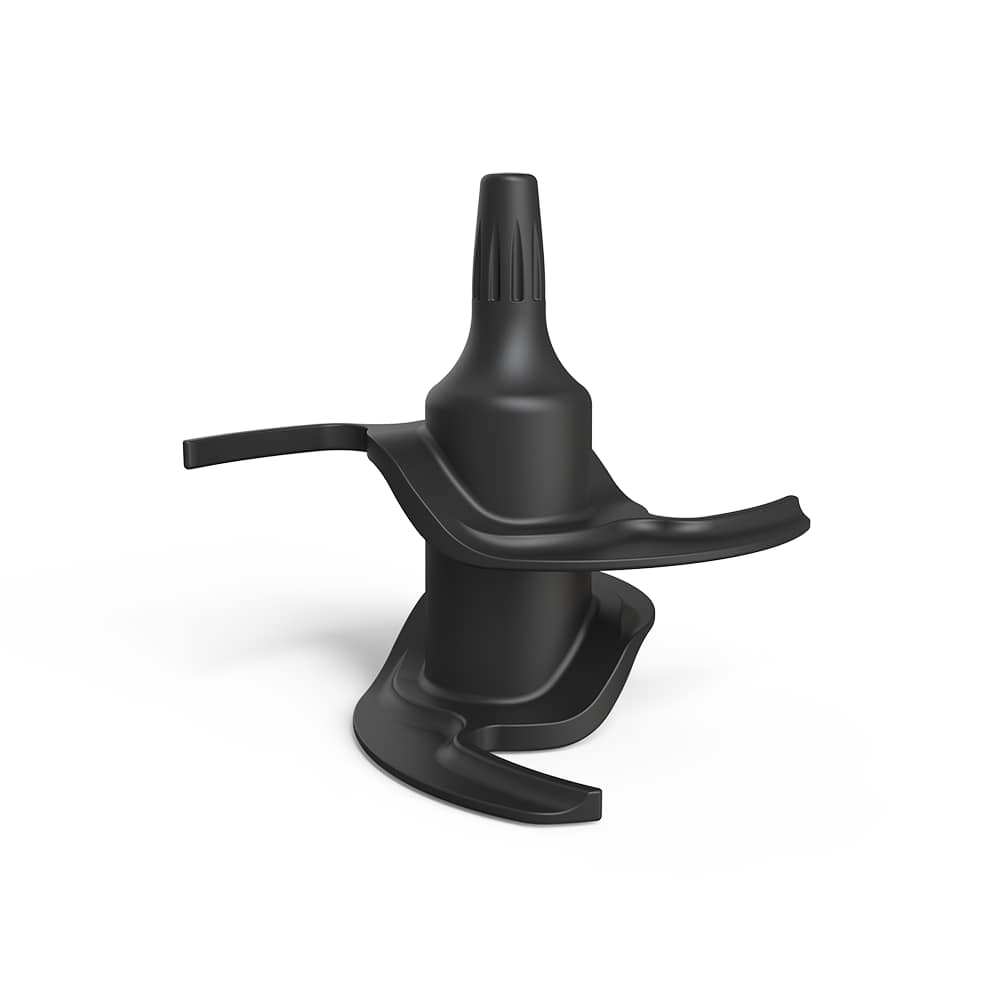
Unlike standard chopping blades, the Ninja dough blade features a unique paddle design that gently folds and kneads ingredients without cutting or shredding them. By following these precise techniques, you’ll create perfectly developed dough with proper gluten structure every time—no guesswork required. This guide reveals the exact steps, timing, and troubleshooting methods professionals use to get flawless results with their Ninja system.
Confirm Your Ninja Model Supports Dough Blade
Check Compatibility Before Installation
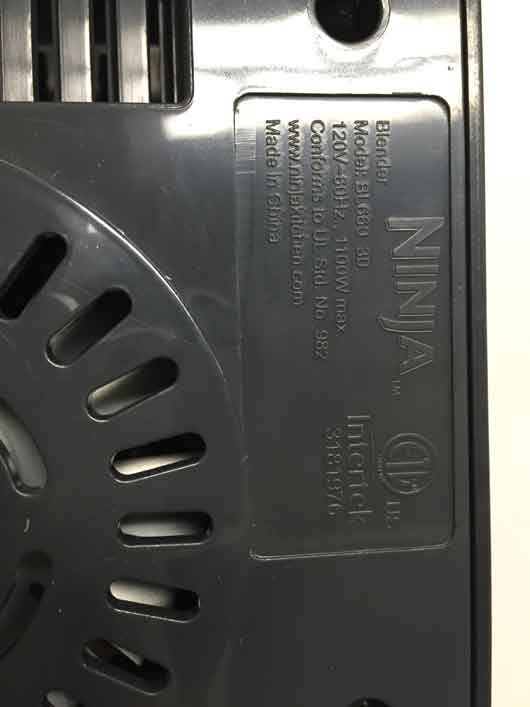
Don’t risk damaging your appliance—verify your Ninja model works with the dough blade before proceeding. Locate the model number on the bottom of your unit and cross-reference with these compatible systems:
- Ninja Professional Plus Food Processor
- Ninja Mega Kitchen System
- Ninja Foodi Power Pitcher System
- Ninja Intelli-Sense Kitchen System
The dough blade won’t fit properly on incompatible models, potentially causing motor strain or uneven mixing. If your model isn’t listed, contact Ninja customer support before attempting installation—using the wrong attachment voids your warranty and risks permanent damage to your appliance.
Install Your Dough Blade Without Mistakes
Secure Attachment Process
Proper installation prevents wobbling and ensures even kneading. Follow these exact steps for perfect blade positioning:
- Unplug your Ninja completely—never install blades while connected
- Remove the bowl from the motor base
- Lift out any existing blade assembly straight up
- Align the dough blade’s center hub with the drive shaft
- Press down firmly until you hear a distinct click
- Test security by gently trying to rotate the blade—no movement should occur
The blade must lock solidly in place. If it spins freely or wobbles, remove and reinstall until properly seated. A loose blade creates uneven dough texture and strains your motor—this single step prevents 90% of common dough-making failures.
Load Ingredients in the Correct Order
Temperature and Sequence Matters
Your dough’s success starts with proper ingredient preparation. Room temperature ingredients blend more evenly, but cold fats like butter should be cut into ½-inch cubes to maintain flakiness in pastry dough. For yeast activation, warm liquids must hit the sweet spot of 105-110°F—too hot kills yeast, too cold slows rising.
Follow this exact layering sequence:
1. Liquids first (water, milk, eggs, oil)
2. Yeast dissolved in warm liquid
3. Dry ingredients on top (flour, sugar, salt)
4. Fat ingredients last
This order prevents flour from clumping at the bottom and ensures even incorporation. Never dump everything in at once—proper layering is the secret to smooth, elastic dough without over-processing.
Operate Your Ninja for Perfect Dough Texture

Speed and Timing Formula
Your Ninja’s speed settings directly impact gluten development. Use this professional timing guide for flawless results:
- Speed 1 (Low): 15-30 seconds for initial mixing—just until ingredients combine
- Speed 2 (Medium): 45-90 seconds total for kneading, in 15-20 second bursts
- Between bursts: 5-10 second rest periods to prevent motor overheating
Watch through the clear lid—your dough is ready when it forms a smooth ball that clears the sides of the bowl. Over-processing creates tough, dense results, while under-processing leaves shaggy, uneven texture. For bread and pizza dough, perform the windowpane test: stretch a small piece until nearly transparent without tearing.
Fix Sticky Dough in 60 Seconds
Immediate Solutions for Common Problems
Sticky dough? Don’t panic—this happens when humidity affects flour absorption. Add flour 1 tablespoon at a time through the feed tube while pulsing briefly after each addition. Never exceed ¼ cup extra flour, or your dough will become dry and crumbly.
Dough climbing the sides? Stop immediately and scrape down with a spatula. This usually indicates too much flour—add liquid 1 teaspoon at a time while processing 5-10 seconds between additions. Test texture by pinching—a properly hydrated dough should be slightly tacky but not stick to your fingers.
Clean Your Dough Blade Properly
Avoid Permanent Damage
Cleaning within 10 minutes prevents dried dough from ruining your blade. Follow this critical sequence:
- Unplug and disassemble completely
- Rinse immediately under warm water—don’t let dough harden
- Brush gently with soft sponge to remove residue
- Wash with mild detergent
- Dry thoroughly before storage
Never soak your dough blade—water can seep into the hub mechanism. Store it separately from sharp cutting blades to prevent nicks that affect performance. Check the central hub for dough buildup before each use—this hidden spot causes wobbling and uneven kneading.
Adapt Any Recipe for Ninja Success
Conversion Guidelines for Perfect Results
When converting hand-mix recipes, start with 90% of the liquid called for in the recipe—you can always add more. Reduce mixing time by 50-75% compared to traditional methods. For consistent results:
- Weigh ingredients instead of measuring by volume
- Never exceed ¾ full in your bowl—dough expands during processing
- Maximum capacity: 4 cups flour for 64 oz bowls, 5 cups for 72 oz models
Pizza dough makers should note: Ninja systems create restaurant-quality crust in under 2 minutes. Use bread or 00 flour, process 45 seconds total, then rest dough 10 minutes before shaping. The result? Crispy exteriors with airy, chewy interiors that impress even experienced bakers.
Prevent Motor Overheating During Processing
Warning Signs and Solutions
Listen for these critical overheating indicators:
– Motor slowing or straining
– Excessive heat from the base unit
– Burning smell during operation
Stop immediately if you notice these signs. Allow 5 minutes of cooling time between processing intervals. If your motor regularly strains, you’re likely overloading the bowl—reduce batch size by 25% for optimal performance. Always verify proper blade installation first; a loose attachment is the most common cause of motor stress.
Store Dough for Best Results
Refrigeration and Freezing Techniques
Refrigerate wrapped dough up to 24 hours for enhanced flavor development. Bring to room temperature before using—this usually takes 1-2 hours depending on dough type. For longer storage:
- Portion into recipe-sized balls
- Double-wrap in plastic wrap then foil
- Label clearly with date and dough type
- Thaw overnight in refrigerator before use
Frozen dough maintains quality for up to 3 months. Never refreeze thawed dough—this creates texture issues. For pizza enthusiasts: pre-shape frozen dough into crusts before freezing for instant homemade pizza nights.
Master Advanced Dough Techniques
Professional-Level Results at Home
Create bakery-quality laminated doughs by processing the base first, then chilling before manual folding. For herb-infused breads, add fresh rosemary or thyme during initial mixing. Incorporate cheese through the feed tube in the final 10 seconds for even distribution without over-processing.
Pro tip: Sift dry ingredients first for lighter texture, and create a well in the center for liquid addition. Rest dough 5 minutes after initial mixing before final kneading—this allows gluten to relax for better elasticity. Note your exact processing times for future reference; small adjustments make big differences in results.
Safety Rules You Must Follow
Non-Negotiable Safety Practices
Never compromise on these critical safety measures:
– Always unplug before cleaning or changing blades
– Lock lid completely before starting—never operate without secure lid
– Use pusher tool only—never insert fingers into feed tube
– Keep hair and loose clothing away from moving parts
– Store blade out of children’s reach when not in use
A properly installed dough blade won’t cut like chopping blades, but the spinning motion can still cause injury. Teach older children these safety rules before allowing supervised use. Remember: your Ninja dough blade is designed specifically for dough—never use it for chopping hard ingredients, which can damage the paddle design.
Final Note: With these precise techniques, your Ninja dough blade will deliver professional-quality results consistently. Start with simple bread recipes to master timing, then experiment with artisanal pizza and laminated pastries. Within weeks, you’ll wonder how you ever baked without this game-changing attachment—your homemade bread will rise higher, your pizza crust will achieve perfect char, and your pastry will rival bakery standards, all in a fraction of the time. The secret to perfect dough isn’t hours of labor—it’s knowing exactly how to use your Ninja dough blade.


