
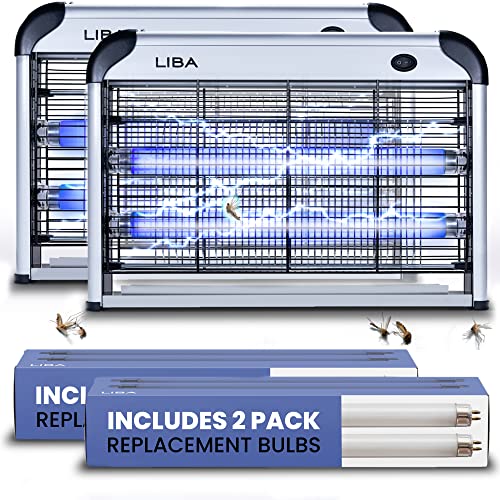
If your LIBA bug zapper has lost its zapping power and isn’t capturing mosquitoes like it used to, you’re probably dealing with a worn-out UV bulb. When your bug zapper’s fluorescent tube dims or stops illuminating completely, replacing the bulb is the most cost-effective solution to restore its insect-eliminating performance. This straightforward LIBA bug zapper bulb replacement process takes less than 15 minutes and requires only basic tools. In this guide, you’ll learn exactly how to safely replace your LIBA bug zapper bulbs without damaging the unit or risking electrical hazards.
Many homeowners mistakenly believe their entire bug zapper needs replacement when it’s actually just the UV bulb that’s reached the end of its lifespan. The 10W T8 UV fluorescent bulbs in LIBA zappers typically last around 5,000 hours before UV output diminishes significantly. Without proper UV light emission, your bug zapper can’t effectively attract flying pests, rendering the electrical grid useless. By following this precise replacement method, you’ll extend your LIBA bug zapper’s life for years while maintaining a pest-free outdoor environment.
Critical Safety Steps Before Removing Your LIBA Bug Zapper Bulb
Before touching any part of your bug zapper, you must follow these non-negotiable safety procedures to prevent electrical shock or injury. The high-voltage grid in LIBA zappers can deliver a dangerous shock even when the unit appears off, making proper safety protocol essential.
Always Disconnect Power Completely
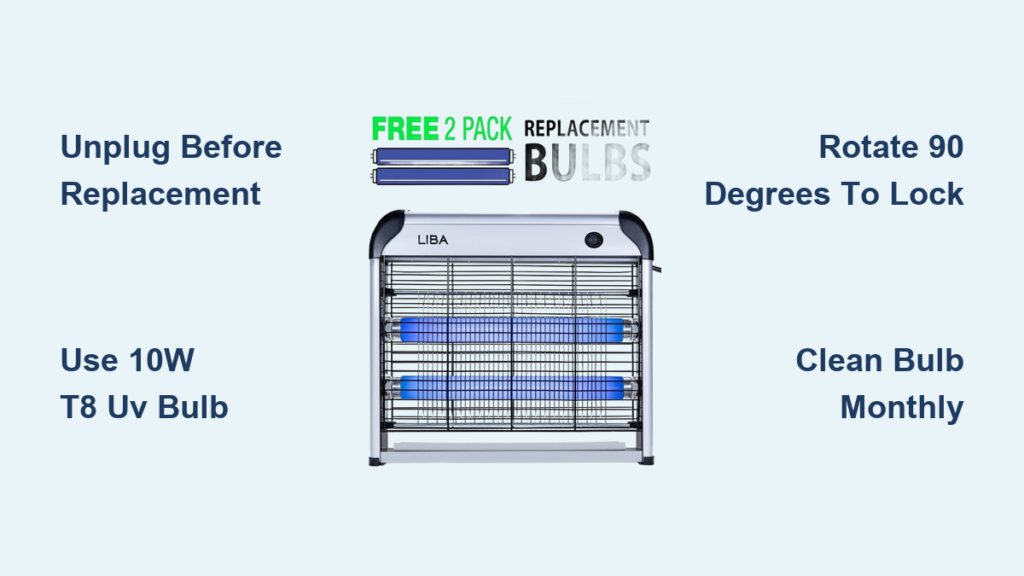
Unplug your LIBA bug zapper from the wall outlet and verify no power is flowing to the unit. Never attempt bulb replacement while the zapper remains plugged in, even if the switch is in the “off” position. Modern bug zappers often have internal capacitors that store electrical charge, so waiting 10 minutes after unplugging ensures complete discharge. Confirm the power is completely disconnected by attempting to turn on the unit—nothing should happen.
Gather Essential Replacement Tools
For a successful LIBA bug zapper bulb replacement, assemble these specific items before beginning: a new 10W T8 UV fluorescent bulb (13 inches long), a Phillips-head screwdriver for housing access, rubber gloves for safe handling, and safety glasses to protect against potential glass breakage. The gloves prevent skin oils from transferring to the new bulb, which can create hot spots and shorten its lifespan. Keep a small container nearby to safely dispose of the old bulb, as it contains trace amounts of mercury.
Verify Your Work Environment Is Safe
Perform the bulb replacement in a dry, well-lit indoor area away from children and pets. Never work on your LIBA bug zapper outdoors during or immediately after rain, as moisture dramatically increases electrical risks. Ensure your hands are completely dry and you’re standing on a non-conductive surface like a rubber mat or dry wooden board. If your bug zapper was mounted outdoors, bring it inside for replacement rather than working with it in place.
How to Properly Remove Your Old 10W T8 UV Bug Zapper Bulb
With safety precautions in place, you can now access and remove the spent bulb from your LIBA zapper. This process requires careful handling to avoid damaging the delicate sockets or breaking the glass tube.
Accessing the Bulb Housing Safely
Carefully remove the protective outer grid by unscrewing the 2-4 retaining screws with your Phillips-head screwdriver. Most LIBA models have a simple snap-on cover that releases with gentle pressure—never force the housing as plastic components become brittle over time. Once the grid is removed, set it aside in a safe location to avoid losing small parts. If your model has an inner protective mesh, carefully detach this as well to expose the bulb sockets.
Correct Technique for Bulb Removal
Locate the bulb ends seated in the T8 sockets at both ends of the housing. Apply even pressure to both ends simultaneously while rotating the bulb 90 degrees counterclockwise. This releases the bulb pins from their slots. If the bulb resists turning, gently wiggle it while maintaining rotational pressure—never yank or twist forcefully. Once released, pull the bulb straight out while supporting its full length to prevent bending or breakage. Place the old bulb immediately into your disposal container.
Selecting Your Exact 10W T8 UV Replacement Bulb for LIBA Zappers
Choosing the wrong replacement bulb is the most common mistake that renders your LIBA bug zapper ineffective after replacement. Standard household fluorescent bulbs won’t attract insects, so precise specifications are critical.
Must-Have Specifications for LIBA Compatibility
Your replacement must match these exact specifications: 13-inch length (33 cm), 1-inch diameter (2.54 cm), 10W T8 UV fluorescent with G13 bi-pin base. Verify the packaging specifically states “for bug zappers” or “insect attraction” as standard bulbs lack the proper UV spectrum. The correct bulb emits light at 5000K color temperature, producing the bright white/blue glow that maximizes insect attraction. Never substitute with LED bulbs unless your LIBA model specifically supports them.
Where to Find Genuine Replacement Bulbs
Purchase replacement bulbs from authorized LIBA retailers, major home improvement stores, or reputable online sellers specializing in pest control equipment. Avoid suspiciously cheap bulbs on general marketplaces, as counterfeit products often fail to deliver the necessary UV output. Genuine replacement bulbs typically cost $15-25 each and often come in convenient 2-packs. Check customer reviews specifically mentioning LIBA compatibility before purchasing.
Step-by-Step Installation of Your New LIBA Bug Zapper Bulb
Proper installation ensures optimal contact between bulb pins and sockets, preventing flickering or failure to illuminate after replacement.
Aligning and Inserting the New UV Bulb
With the housing open, line up the pins on both ends of your new bulb with the socket notches, ensuring perfect alignment before insertion. Gently push the bulb straight into both sockets until you feel slight resistance—do not force it. If the pins don’t slide easily, rotate the bulb slightly until they catch the slots. Proper alignment prevents bent pins that cause poor electrical contact and premature bulb failure.
Securing the Bulb for Maximum Performance
Once seated, rotate the bulb 90 degrees clockwise until it locks into place—you should hear a subtle click. Test the security by gently attempting to rotate it back; it should remain firmly in position. Before reassembling, inspect both ends to confirm the bulb sits evenly in both sockets with no visible gaps. A poorly seated bulb creates intermittent contact that reduces UV output and shortens bulb life.
Troubleshooting: Why Your New LIBA Bug Zapper Bulb Won’t Light

If your replacement bulb fails to illuminate after installation, these common issues are likely the culprit.
Checking Electrical Connections First
Immediately unplug the unit and verify the bulb is fully rotated into the locked position. Many installations fail because the bulb wasn’t turned the full 90 degrees to engage the contacts. Remove and reinstall the bulb, ensuring proper alignment and complete rotation. Also check that no debris obstructs the socket contacts—use a dry cotton swab to clean if necessary. Never attempt electrical checks while the unit remains plugged in.
Identifying Compatibility Problems
If the bulb still won’t light, confirm you purchased the correct 10W T8 UV specification. Standard fluorescent bulbs won’t work in bug zappers despite fitting physically. Some newer LIBA models require specific ballast compatibility—check your unit’s manual for model-specific requirements. If you’re certain of compatibility, the issue may lie with the unit’s internal components rather than the bulb itself.
LIBA Bug Zapper Bulb Maintenance: Maximizing UV Output
Proper maintenance extends bulb life and maintains maximum insect attraction between replacements.
Monthly Cleaning Protocol for Optimal Performance
Unplug your LIBA bug zapper weekly and wipe the bulb surface with a soft, dry microfiber cloth to remove dust that blocks UV light. Dirty bulbs can reduce effectiveness by up to 40%—a clean bulb makes the difference between moderate and exceptional pest control. Never use liquids or cleaning solutions directly on the bulb, as moisture can damage electrical components. Perform this quick cleaning while the unit is unplugged for safety.
How Often to Replace Your LIBA Bug Zapper Bulb for Peak Performance
Knowing when to replace prevents wasted time troubleshooting reduced effectiveness.
Visible Signs Your Bulb Needs Replacement
Watch for darkened ends, inconsistent illumination, or reduced insect capture—these indicate your UV bulb is nearing the end of its 5,000-hour lifespan. Even if the bulb still lights, UV output diminishes long before complete failure, reducing attraction power. For seasonal users, replace bulbs annually at the start of mosquito season. Heavy users in tropical climates should replace bulbs every 8-10 months of continuous operation.
Common Mistakes That Damage Your LIBA Bug Zapper During Bulb Replacement
Avoid these frequent errors that cause unnecessary damage during the replacement process.
Forcing Components and Using Improper Tools
Never use metal tools near the electrical grid or force stuck components—LIBA housings use fragile plastic that cracks easily. If screws are stuck, apply gentle pressure while tapping the screwdriver handle with a rubber mallet rather than forcing it. Never substitute standard household bulbs, as incorrect wattage can overload the ballast. Always handle bulbs with gloves to prevent skin oils from creating hot spots that shorten bulb life.
Replacing your LIBA bug zapper bulbs properly restores its insect-zapping power with minimal effort. By following these precise steps, you’ve ensured your unit will continue protecting your outdoor space from mosquitoes and other flying pests. Remember to schedule annual bulb replacements before peak bug season and clean the unit monthly for maximum effectiveness. A well-maintained LIBA bug zapper with fresh UV bulbs can operate effectively for many years, providing chemical-free pest control for your patio, deck, or backyard. Keep this guide handy for your next bulb replacement—you’ll be back to enjoying pest-free evenings in no time.


