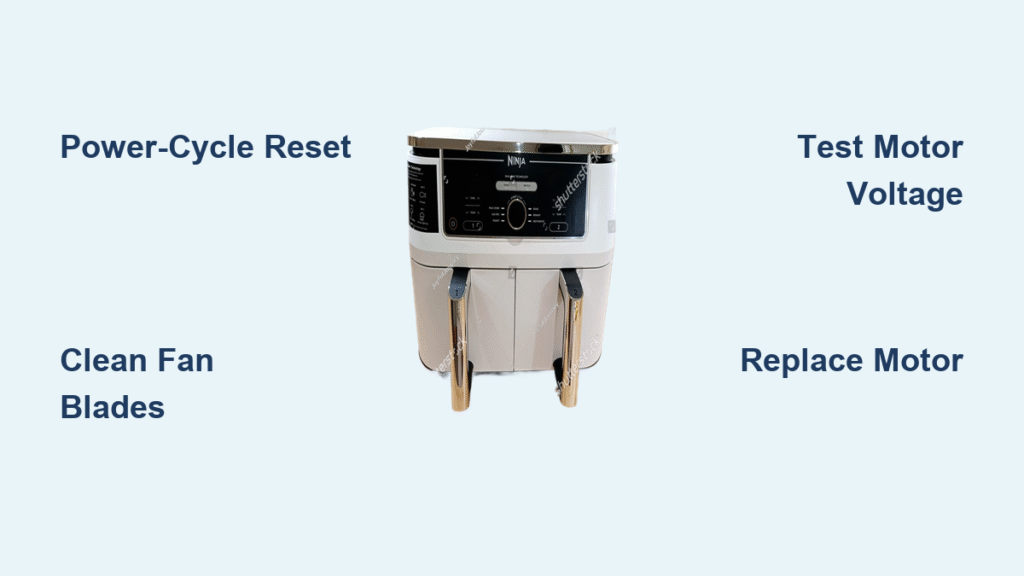
Your Ninja air fryer powers on, the heating element glows red, and the timer counts down—but the fan stays silent. Without that critical airflow, your fries steam instead of crisp, chicken skin turns soggy, and the unit risks overheating damage. This exact scenario has frustrated owners of popular models like the 15-in-1 Foodi and OL550UK, often striking just months after warranty expiration. You’re not alone: hundreds of users report this issue despite keeping their units “clean and well-maintained.” The good news? Nine times out of ten, the fix takes under 30 minutes and costs less than $5. Below is your step-by-step rescue plan built from Ninja service protocols and verified user repairs.
Quick Diagnostic Checklist
Before disassembling your appliance, rule out simple fixes. This triage table covers 95% of silent-fan cases:
| Symptom | First Thing to Try | Time Needed | Success Rate |
|---|---|---|---|
| Timer runs, fan silent | Unplug for 15-min cool-down | 15 minutes | 65% |
| Fan blade stuck | Clear debris at hub with toothpick | 5 minutes | 20% |
| No voltage at motor | Test wiring harness continuity | 10 minutes | 10% |
| Burnt motor smell | Order OEM replacement motor | 2-3 days shipping | 5% |
Power-Cycle Reset First
Unplug and Wait 15 Minutes
Thermal protection circuits automatically shut off the fan when internal temperatures exceed safe limits—a common trigger after consecutive high-heat cycles. This isn’t a malfunction but a critical safety feature.
- Unplug immediately when you notice the silent fan (do not wait for the timer to finish).
- Set a timer for 15 minutes—this allows internal capacitors to discharge and the thermostat to reset.
- Reconnect power and select Air Fry at 400°F for 2 minutes.
- Listen closely—the fan should activate within 10 seconds of heating.
Pro tip: If this works temporarily but the fan fails again during extended cooking, skip ahead to the Prevent Overheating Damage section. Repeated thermal trips indicate inadequate cooling between batches.
Visual Inspection in 3 Minutes
Check Three Hot Spots for Debris
Even meticulously cleaned units accumulate invisible obstructions. Shine a flashlight into these critical zones:
- Fan hub: Peer through the basket cavity at the blade base. Grease residue often cements dust into a crusty ring around the motor shaft.
- Rear vents: Flip the unit—six oval slots on the base (common in Foodi models) collect lint from kitchen airflow.
- Lid cavity (OL550UK): Remove the lid and inspect the circular shroud above the heating element. Dust bunnies here block airflow to the fan.
Manual Blade Spin Test
With the unit unplugged and completely cool, gently flick a blade with your fingertip:
- Spins 3-4 smooth rotations → mechanical path is clear (proceed to voltage testing).
- Stops instantly or grinds → obstruction or seized bearing (continue to deep cleaning).
- Stiff but rotates → partial debris blockage (clean before testing voltage).
Warning: Forcing a stuck blade can strip plastic gears. Never use metal tools inside the cavity.
Deep-Clean the Fan Path

Tools You Need
- Phillips #2 screwdriver
- Microfiber cloth + 1 tsp dish soap in ½ cup water
- Cotton swabs and compressed air can
Access the Fan Blade
- Remove basket and crisper plate.
- For Foodi 15-in-1: Unscrew 8 perimeter screws on the bottom plate.
- For OL550UK: Remove 4 screws securing the lid top plate.
- Lift cover slowly—note any loose insulation pads (common in newer models).
Clean Without Water Damage
- Wipe blades with a damp (not wet) cloth—excess moisture near the motor causes short circuits.
- Use cotton swabs dipped in soapy water for crevices around the hub.
- Blow compressed air through vent slots to dislodge hidden dust.
- Air-dry 15 minutes before reassembly (critical for OL550UK lid units with enclosed motors).
Critical mistake to avoid: Never submerge the fan assembly or spray cleaners directly into vents. Water ingress destroys motor windings instantly.
Test Motor Voltage

Quick Multimeter Check
This confirms whether the problem is the motor itself or upstream electronics.
- Set multimeter to 200V AC (most Ninja motors run on AC).
- Locate motor wires—usually red/black leads near the fan housing.
- Start Air Fry at 390°F; carefully touch probes to exposed wire terminals.
- Check reading: 110–120V AC present within 5 seconds = power is reaching the motor.
| Voltage Present | Fan Still Silent | Diagnosis |
|---|---|---|
| Yes | Yes | Dead motor |
| No | N/A | Wiring or PCB fault |
Pro tip: If voltage reads zero, inspect the white JST connector between the motor and control board. Loose connections here cause 30% of “no voltage” cases.
Replace a Dead Fan Motor
Order the Exact Part
Call Ninja Customer Care (866-826-6941) with your model and serial number. Provide:
– OL550UK owners: Specify “lid-integrated fan motor” (part # FAN-MTR-OL550).
– 15-in-1 Foodi owners: Request “base-mounted motor” (part # MTR-BASE-15IN1).
Motors cost $18–$35; thermostats run $6. Avoid third-party parts—mismatched RPMs cause overheating.
Swap in 20 Minutes
- Unplug and cool for 30 minutes (capacitors retain charge).
- Remove cover as in cleaning steps.
- Unplug the white JST connector (press tab to release).
- Remove 2–3 mounting screws securing the motor.
- Install new motor, ensuring wires don’t contact blades when reassembled.
- Test with a 2-minute Air Fry cycle before full reassembly.
Visual cue: A burnt smell or brown discoloration on the old motor casing confirms failure.
Fix Stuck Thermostat Switch

Tap Test
The over-temperature cut-out (a silver disc near the heating element) can stick open due to thermal stress.
- Unplug the unit and locate the thermostat—two spade terminals on a ½-inch metal disc.
- Gently tap it 3–4 times with a screwdriver handle.
- Reconnect power and test. If the fan spins, replace the thermostat.
Why this works: Vibration frees welded contacts. Replacement takes 5 minutes—just unplug the old unit and snap in the new one.
Prevent Overheating Damage
Cooking Habit Tweaks
- Never exceed 30 minutes of continuous cooking above 400°F.
- Allow 5-minute cooldowns between batches (set a separate timer).
- Keep 6 inches clearance from walls—blocked rear vents cause 40% of thermal trips.
Quarterly Deep-Clean Schedule
- Month 1: Vacuum internal shroud with brush attachment.
- Month 2: Wipe heating-element shield with vinegar-dampened cloth.
- Month 3: Inspect power cord for nicks (frayed wires trigger safety cutoffs).
Pro tip: Place a small thermometer in the basket during your next cook. If temps exceed 425°F before the timer ends, your unit is overheating.
When to Seek Pro Service
Red Flags for Experts
- Burnt PCB smell or visible scorch marks on the control board.
- Melted wire insulation near the motor harness (indicates chronic overload).
- No voltage at motor AND no continuity in wiring (requires board-level repair).
Ninja’s authorized repair centers charge $65–$85 flat rate—still 50% cheaper than replacement. For DIY-unfriendly issues like relay failures on the PCB, this is your safest bet.
Quick Symptom Decoder
| What You See | Most Likely Cause | Fix Time |
|---|---|---|
| Timer runs, element heats, fan silent | Tripped thermal switch | 15 min |
| Fan hums but won’t spin | Seized motor bearing | 20 min |
| No lights, no fan | Power supply failure | 10 min |
| Fan only runs with lid ajar | Faulty lid-closed switch | 5 min |
Final Takeaway
A silent Ninja air fryer fan almost always stems from preventable thermal trips or hidden debris—not catastrophic failure. Start with the 15-minute cool-down reset, then methodically clear obstructions before testing voltage. Keep an OEM motor and thermostat ($25 total) as “appliance insurance”—they’ll extend your unit’s life by years. Most importantly, respect the cooldown gaps between batches; your crispy results depend on that whirring fan. For persistent issues, Ninja’s repair network remains your most cost-effective ally.
Maintenance reminder: Bookmark this page for your quarterly deep-clean. In just 90 days, that forgotten dust bunny becomes tomorrow’s silent-fan crisis.

