
That acrid, chemical-like odor hitting your senses when you first turn on your new Ninja air fryer? You’re not alone. The burning plastic smell from Ninja air fryers is one of the most common issues reported by new owners, triggering understandable safety concerns. This overwhelming scent during initial use sends many users scrambling to return their appliance, thinking it’s defective.
This guide delivers precise solutions to eliminate that burning plastic smell from your Ninja air fryer permanently. You’ll discover exactly why this happens, when it’s normal versus dangerous, and most importantly—step-by-step fixes that work. Whether you’re unpacking today or battling persistent odors after weeks of use, these proven methods will restore safe, odor-free cooking in your kitchen.
Why Your New Ninja Air Fryer Emits Burning Plastic Odors
Manufacturing Residues Triggering Initial Smell
Your Ninja air fryer arrives coated in invisible protective layers applied during manufacturing. Anti-corrosion coatings cover the heating elements, machining oils lubricate metal components, and plastic parts near heat zones release volatile organic compounds (VOCs) when first heated. These residues are essential for preventing damage during shipping but create that alarming burning plastic smell when exposed to high temperatures.
The heating element undergoes an initial “seasoning” process where these residues burn off, intensifying above 350°F. This explains why the smell worsens when cooking at higher temperatures during your first few uses. Proper ventilation during this phase is crucial for safety and faster odor elimination.
Normal vs. Dangerous Burning Plastic Smell Patterns
Normal burn-off characteristics:
– Faint to moderate plastic scent during first 15-20 minutes of operation
– No visible smoke or error codes
– Odor originates only from vent areas
– Completely disappears within 3-5 cooking cycles
Stop using immediately if you notice:
– Persistent odor beyond 10 uses
– Visible smoke accompanying the smell
– Eye or throat irritation
– Odor from electrical cord or control panel
– Melting or warping of any components
First-Use Burn-Off Protocol That Actually Works

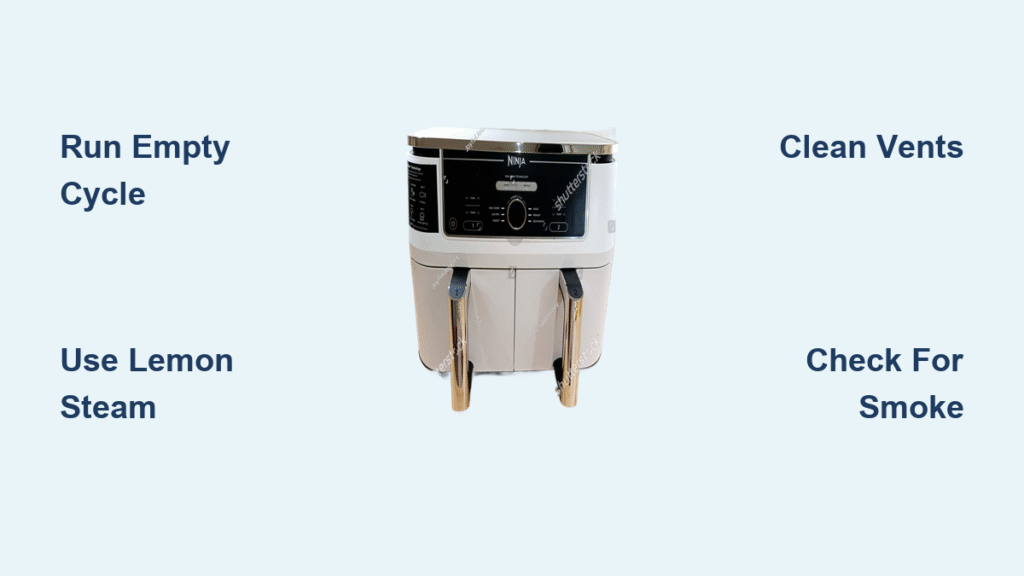
Essential Empty Cycle Procedure
Skip straight to these steps before cooking your first meal:
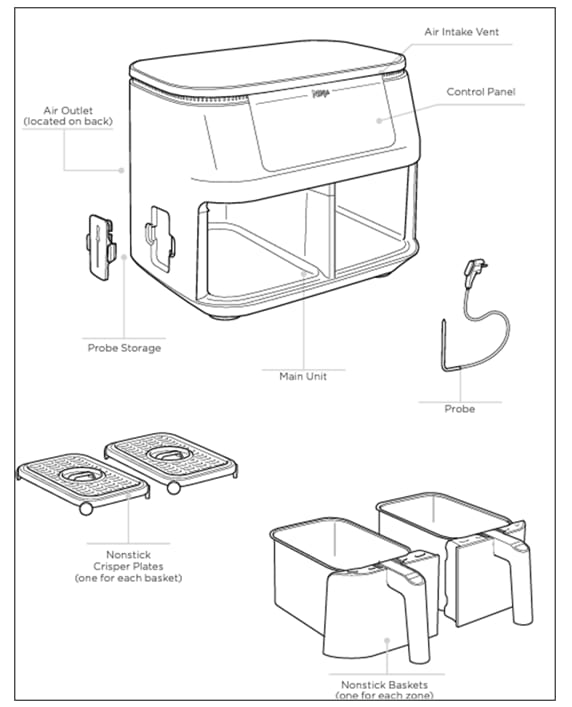
- Complete unpacking: Remove every foam insert, plastic bag, and protective sticker
- Thorough washing: Clean basket and crisper plate with warm, soapy water
- Initial empty cycle: Run at 400°F for 20 minutes with kitchen windows open
- Cooling period: Allow 30+ minutes for complete cooling between cycles
- Secondary cycle: Repeat at 400°F for 15 minutes
- Final neutralizing cycle: Run at 350°F with lemon slices in basket for 15 minutes
Pro tip: Schedule this burn-off process when you can ventilate your kitchen for 2-3 hours. The smell temporarily intensifies during this critical phase.
Quick Odor Elimination Methods for Time-Crunched Users
When you need faster results:
Lemon steam treatment: Fill basket with 1 cup water plus lemon slices. Run at 350°F for 15 minutes. The citric acid neutralizes plastic VOCs more effectively than baking soda alone.
Coffee ground absorption: Place used coffee grounds in a heat-safe bowl in the basket overnight between uses. Replace daily until odor disappears completely.
Vinegar solution wipe-down: Mix equal parts white vinegar and water, then gently wipe interior surfaces (when cool) to neutralize stubborn odors.
Model-Specific Burning Plastic Smell Solutions
Ninja Foodi DualZone Units
DualZone models show higher odor incidence due to dual heating elements. The XL capacity requires 7-10 burn-off cycles instead of the standard 5. Start with single-zone operation for first 3 uses to reduce intensity and prevent overwhelming odors.
Air Fryer Max XL (450°F Models)
Higher temperature capability means stronger initial odors. Begin burn-off at 375°F for first 2 cycles, then increase to maximum temperature. Ceramic-coated baskets may emit additional ceramic-specific odors for first 3-4 uses—this is normal and should dissipate.
Ninja Speedi Series
Rapid heating technology concentrates odors during faster preheat cycles. Run 3 empty cycles at 400°F for 12 minutes each, with 20-minute cooling periods between sessions to allow complete residue burn-off without component stress.
Troubleshooting Persistent Burning Plastic Smells
When Odor Won’t Disappear After 10 Uses
If plastic smell continues beyond 10 uses:
Deep cleaning checklist:
– Unplug and cool unit completely before inspection
– Clean air intake vents with soft brush to remove trapped particles
– Check for hidden packaging residue in crevices
– Inspect heating elements for melted plastic debris
Critical warning signs requiring immediate discontinuation:
– Electrical cord emitting burning smell (stop using immediately)
– Control panel odor indicating internal electrical issues
– Bottom unit smell suggesting motor problems
– Any visible smoke with the plastic odor
Advanced Odor Removal Techniques
For stubborn cases after 15+ uses:
Herbal smoke cleanse: Burn rosemary or sage in a heat-safe dish at 300°F for 8-minute intervals. Natural oils absorb persistent plastic odors effectively.
Activated charcoal treatment: Use food-grade charcoal briquettes during 2-3 empty cycles at 325°F. Charcoal’s porous structure traps odor molecules.
Citrus peel rotation: Cook orange, lemon, or lime peels at 300°F for 10-minute intervals to both absorb odors and leave pleasant residual scent.
Preventing Future Burning Plastic Smells
First-Use Preparation Checklist
Before your initial cooking session:
– Verify manufacturing date (look for production sticker on base)
– Inspect packaging for storage damage that might indicate poor conditions
– Plan first use for a well-ventilated day
– Keep kitchen windows open for 3+ hours during burn-off
Long-Term Maintenance Routine
Weekly odor prevention protocol:
– Deep clean all removable parts after every 5 uses
– Wipe heating elements with damp cloth when cool (never use harsh chemicals)
– Clean air intake filters regularly
– Check for food residue causing false burning smells
Usage patterns that prevent odor recurrence:
– Always cook with food in basket after initial burn-off
– Start at lower temperatures (300°F) and gradually increase
– Apply light oil coating on basket surfaces before cooking
Safety Protocols for Dangerous Burning Smells

Emergency Response Steps
Stop using immediately and unplug if you notice:
– Visible smoke with plastic smell
– Sparks or unusual electrical sounds
– Melted or warped plastic components
– Odor from electrical cord or plug
– Error codes accompanying the smell
Critical emergency protocol:
1. Unplug unit immediately
2. Allow complete cooling (minimum 1 hour)
3. Document issues with photos if visible damage exists
4. Contact Ninja customer service with model/serial number
5. Retain purchase receipt for warranty claim
When to Demand Replacement
Ninja covers odor-related issues when:
– Smell persists beyond 10 documented uses
– Accompanied by visible manufacturing defects
– Safety concerns are present
– Unit shows electrical malfunction signs
Documentation needed for successful warranty claim:
– Purchase receipt
– Photos of visible issues
– Written timeline of odor persistence
– Model and serial number from unit base
Your Ninja air fryer should provide years of reliable cooking once properly seasoned. Follow these targeted solutions systematically, and that burning plastic smell will disappear within your first month of regular use. Remember: 95% of users report complete odor elimination by week 3 when following proper burn-off procedures. For persistent issues beyond 15 uses, contact Ninja support immediately—this indicates a manufacturing defect covered under warranty.


