
Your Ninja Foodi isn’t just another countertop appliance—it’s a meal-making powerhouse that transforms tough cuts into fork-tender masterpieces while you’re at work. Whether you’re rocking the classic Multi-Cooker or the latest PossibleCooker PRO, these slow-cook recipes deliver restaurant-quality results with zero babysitting required. Forget dry chicken breasts and mushy vegetables—Ninja’s precision temperature control ensures perfect doneness every time. In the next 10 minutes, you’ll discover how to turn forgotten leftovers into crave-worthy meals, prevent common slow-cooking disasters, and unlock your appliance’s full potential with 15 tested recipes that work flawlessly.
Ninja Foodi Slow-Cook Setup Secrets

Multi-Cooker Method for Foolproof Results
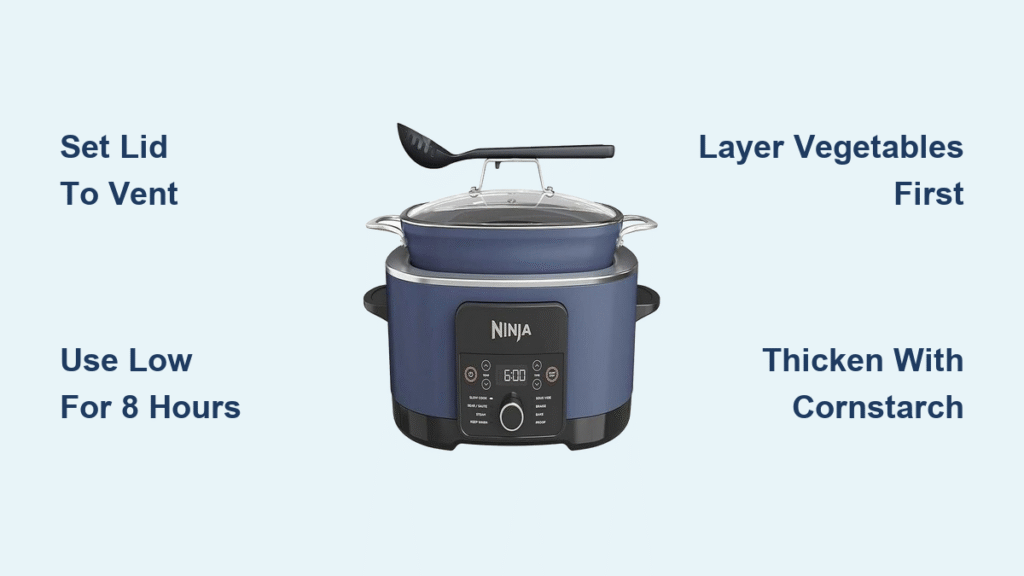
Always secure the slow-cook lid and set the nozzle to VENT before selecting SLOW COOK LOW (6-8 hours) or HIGH (3-4 hours). The ceramic insert distributes heat evenly, eliminating hot spots that cause uneven cooking in traditional crock pots. Never use the pressure lid for slow cooking—this creates dangerous steam buildup. Pro tip: Spray the insert with high-smoke-point oil before adding ingredients to prevent sticking without altering flavors.
PossibleCooker PRO Time Adjustments
This model runs hotter than standard slow cookers—always reduce cook times by 30-60 minutes. The minimum 3-hour setting works perfectly for most dishes, but check tenderness at the 2.5-hour mark. Use the included spoon-lid to stir ingredients without lifting the main lid and losing precious heat. When adapting recipes, remember: HIGH setting on PossibleCooker PRO equals LOW on traditional crock pots for similar results.
Traditional Crock-Pot Conversion Guide
Every Ninja-tested recipe scales directly to vintage appliances. Match LOW times exactly (8 hours LOW remains 8 hours), but halve HIGH times (6 hours HIGH on Ninja = 3 hours HIGH in Crock-Pot). Always verify poultry reaches 165°F internally with an instant-read thermometer—older appliances often run cooler than specified.
Critical Safety Practices for Perfect Results
:max_bytes(150000):strip_icc()/MeatTemperatureSafetyGuidecopy2-8040ef9b998844248fc922154042c2fb.png)
Temperature Targets That Prevent Foodborne Illness
Poultry must hit 165°F—no exceptions. For beef stews, aim for 190°F to fully break down collagen into silky gelatin. Insert your thermometer into the thickest part of meat without touching bone. Never lift the lid during the first 75% of cook time; each peek drops the temperature 10-15°F and adds 20+ minutes to cooking. Visual cue: Properly cooked chicken shreds easily with two forks and shows no pink streaks.
Layering Order That Prevents Mushy Vegetables
Start with dense root vegetables like potatoes and carrots on the bottom—they need longest to soften. Position proteins in the middle layer where heat circulates evenly. Add quick-cook vegetables like green beans during the final 30-60 minutes. Crucially, liquids should barely cover solid ingredients—excess liquid dilutes flavors and creates soggy textures. Common mistake: Overfilling beyond the ⅔ mark causes dangerous overflow during cooking.
Instant Gravy Thickening Without Lumps
Remove solids first, then whisk cornstarch slurry (1 tablespoon cornstarch + 2 tablespoons cold water per cup of liquid) directly into hot juices. Cook on HIGH 5-10 minutes while stirring until glossy and thick. Never add slurry to cold liquid—it won’t thicken properly. If your sauce is too thin, skip the slurry: Cook uncovered on HIGH 15-20 minutes to reduce naturally while intensifying flavors.
Beef Recipes That Melt in Your Mouth
Classic Beef Stew with Root Vegetables (8h LOW)
Dust 2 lbs cubed chuck roast with flour before searing to create an ultra-rich gravy base. Layer carrots and potatoes first, then sear the beef, and top with 1 cup red wine and 2 cups broth. The 8-hour LOW cook transforms budget cuts into collagen-rich comfort food. Pro tip: Add 2 tablespoons tomato paste during searing for deeper flavor complexity without acidity.
BBQ Beef Brisket Worth the Wait (10h LOW)
Rub 3 lbs brisket with 2 tablespoons smoked paprika and 1 teaspoon liquid smoke before slow cooking. The extended LOW setting develops a genuine smoke ring without a smoker. Shred leftovers into crispy carnitas by broiling 3 minutes after shredding. Critical step: Remove excess fat cap before cooking—otherwise, it won’t render properly.
Poultry Recipes Your Family Will Request Weekly
Ninja Foodi BBQ Chicken Perfection (8h LOW)
Use boneless skinless breasts (2 lbs total) with 1 cup quality BBQ sauce poured evenly over top—no stirring needed. The LOW setting prevents dryness by gently steaming the chicken in its own juices. Shred directly in the pot for effortless pulled chicken sandwiches. Nutrition win: Each serving delivers 19g protein for just 180 calories when using sugar-free sauce.
Honey Garlic Chicken Thighs (6h LOW)
Bone-in thighs stay juicier than breasts during slow cooking. Season with 1 tablespoon minced garlic and ½ teaspoon each garlic powder, onion powder, salt, and pepper. Add ¼ cup honey during the final hour for sticky-sweet caramelization. Time-saver: Skip searing—thighs develop flavor perfectly without pre-cooking.
Vegetarian Options Even Carnivores Love
Three Bean Vegetarian Chili (6.25h LOW)
Combine 1 cup each black, kidney, and pinto beans with fire-roasted tomatoes and 2 tablespoons chili powder. The extended cook time melds flavors into a complex, meaty texture. Cost-saving hack: Use dried beans (soaked overnight) instead of canned—add 1 extra cup broth and extend cook time by 1 hour.
Creamy Mashed Potatoes (4h LOW)
Quarter 3 lbs red potatoes and add directly to the pot with 1 cup cream, ½ cup butter, and 1 teaspoon salt. The slow cook infuses every bite with dairy richness without waterlogging. Pro move: Add a whole peeled garlic clove during cooking—remove before mashing for subtle aromatic depth.
Signature Recipe Walkthrough
Ninja Foodi BBQ Chicken Step-by-Step
Critical Prep: Lightly coat the ceramic pot with avocado oil spray to prevent sticking. Lay chicken breasts flat in a single layer—overcrowding causes steaming instead of tenderizing. After 8 hours LOW, shred meat directly in accumulated juices for maximum flavor absorption. Serve over baked potatoes or freeze in 1-cup portions for instant nacho toppings. Avoid this mistake: Adding sauce too early burns the sugars—always pour over raw chicken.
PossibleCooker Chicken & Veggies with Pan Gravy
Season 1.75 lbs chicken breasts with garlic powder, onion powder, salt, and pepper. Place in pot surrounded by quartered red potatoes and carrot pieces. Pour 1 cup broth around (not over) chicken to keep breasts from boiling. Top each breast with a butter pat before cooking HIGH 1.5 hours. Add frozen green beans during the final 15 minutes—they’ll stay crisp-tender. For gravy: Whisk 2 tablespoons cornstarch with ¼ cup water, then stir into juices on HIGH 5 minutes until thickened.
Smart Ingredient Swaps for Empty Pantries
Missing Key Components? No Problem
Out of red potatoes? Swap Yukon Golds but add them 30 minutes later—they cook faster. Missing chicken breasts? Boneless thighs work beautifully—reduce LOW time by 1 hour since they’re more forgiving. No fresh green beans? Frozen work perfectly—add still frozen during the final 20 minutes. Broth emergency? Mix 1 cup water with 1 teaspoon Better Than Bouillon for instant depth.
Thickening Options When Cornstarch Fails
If out of cornstarch, use a flour slurry (2 tablespoons flour + 2 tablespoons water per cup of liquid) but simmer 2-3 minutes longer to eliminate raw flour taste. For dairy-based sauces, stir in 2 tablespoons cream cheese during the final 30 minutes—it melts into luxurious thickness while adding tang. Never add thickeners directly to boiling liquid; always temper with a spoonful of hot broth first.
Meal Prep and Storage Secrets
Freezing for Maximum Flavor Retention
Shredded BBQ chicken maintains perfect texture for 3 months when frozen in 1-cup portions with 2 tablespoons cooking liquid. Complete meals like stews or chili last 2 months—but avoid freezing chicken-and-veggie combos (vegetables turn mushy upon reheating). Pro tip: Freeze gravy separately in ice cube trays, then transfer cubes to bags for instant sauce portions.
Reheating Without Drying Out
Always add 2 tablespoons broth or water when microwaving frozen portions. Cover tightly with a damp paper towel to trap steam. For oven reheating, place in a covered dish at 325°F for 20 minutes—never reheat uncovered. Critical: Never reheat chicken more than once; discard leftovers after 4 days in the fridge.
Your Ninja Foodi transforms meal planning from stressful to effortless. Start with the foolproof BBQ chicken tonight, then master the red wine short ribs that simmer while you conquer your day. These recipes prove that restaurant-quality meals don’t require restaurant hours—just precision slow cooking and the right techniques. Grab your ceramic insert, set the nozzle to VENT, and let your Ninja work its magic while you live your life. The only thing you’ll be adding to your to-do list? “Make these recipes weekly.”


