
Tired of juggling multiple pots while your pasta boils over and sauce splatters everywhere? Your Ninja Foodi transforms chaotic weeknight dinners into streamlined culinary victories with pressure-cooked pasta that emerges perfectly al dente every time. These tested ninja foodi pasta recipes eliminate the guesswork, delivering everything from creamy Alfredo to hearty goulash in under 30 minutes with just one pot to clean.
You’ll master the timing secrets, layering tricks, and finishing techniques that turn this countertop wonder into your personal Italian grandmother—minus the arm workout from endless stirring. Whether you’re feeding a hungry family or meal prepping for the week, these ninja foodi pasta recipes deliver restaurant-quality results without the kitchen chaos.
Why Your Ninja Foodi Outperforms Traditional Pasta Methods

The real magic happens through pressure cooking’s ability to force sauce deep into pasta shapes while maintaining structural integrity—no more watery sauce floating above mushy noodles. The Foodi’s integrated sauté function builds flavor foundations by browning proteins directly in the pot, pressure cooking infuses seasonings throughout both sauce and noodles, and the broiler lid adds that coveted golden cheese crust—all without transferring between pans.
Traditional stovetop methods require constant monitoring and separate vessels that multiply cleanup time. Your Ninja Foodi handles everything from browning meat to melting cheese in one vessel, cutting cleanup time by 75% while enhancing flavor through integrated cooking. The sealed environment prevents flavor evaporation, ensuring every bite delivers maximum taste intensity.
Ninja Foodi Pasta Cooking Rules That Guarantee Success
Liquid Requirements That Prevent Burn Notices
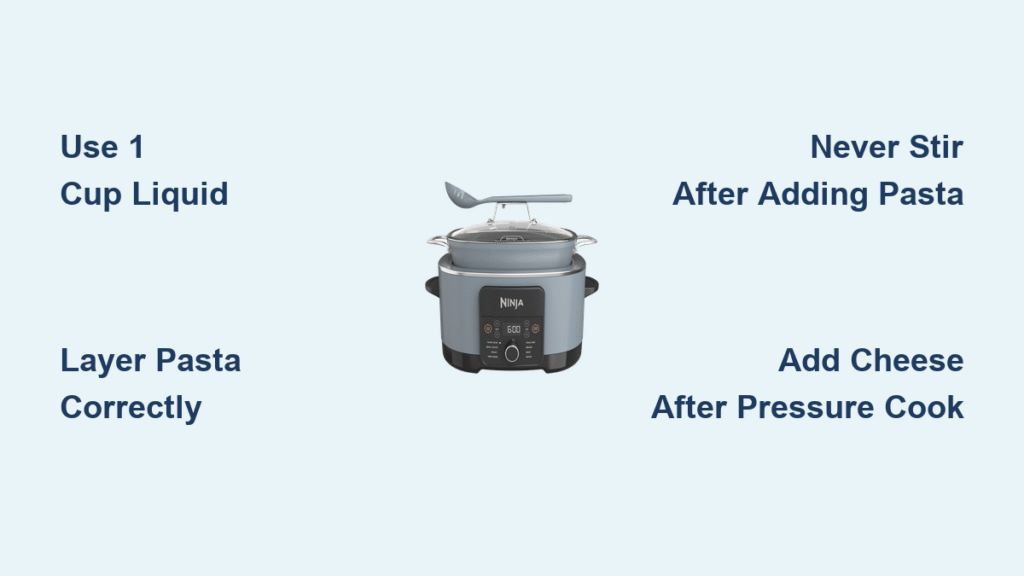
Every pressure pasta dish needs at least 1 cup of thin liquid—water, broth, or thinned sauce—to generate proper steam pressure. Tomato sauces alone trigger burn warnings because they’re too thick to create adequate pressure. Always rinse your sauce jar with water or broth to capture every flavor molecule while meeting liquid requirements.
Layer thin liquids first, followed by proteins and seasonings. Never stir after adding pasta—this prevents sticking and ensures even cooking. The Foodi’s pressure environment naturally circulates liquid around the pasta without manual intervention.
Timing Formula for Perfect Texture Every Time
Calculate pressure cooking time using this foolproof formula: half the package’s stovetop time minus 1 minute. For example, 12-minute penne becomes 5 minutes on High pressure. Always factor in a 2-3 minute natural release, then quick-release remaining pressure to prevent overcooking.
Gluten-free pasta requires special attention—Barilla and Skinner rotini brands consistently deliver the best results without gumminess. For these varieties, follow the same timing formula but quick-release immediately after natural release to maintain texture integrity.
Strategic Pasta Placement Techniques
Long noodles like spaghetti require criss-cross layering to prevent clumping. Lay strands in alternating directions, creating a lattice pattern that allows steam circulation. Short pasta gets scattered evenly across the surface, then gently pressed below liquid level using the back of a spoon.
Critical tip: For spaghetti dishes, break strands to fit your Foodi pot before layering. This prevents uneven cooking and ensures every strand receives equal pressure exposure during cooking.
Classic Mostaccioli with Mozzarella Crust Recipe

This cheesy, beefy crowd-pleaser demonstrates the Foodi’s layering technique while delivering that coveted baked pasta texture. The recipe scales perfectly for meal prep or potluck contributions, making it one of the most popular ninja foodi pasta recipes for family dinners.
Ingredients for Perfect Mostaccioli
- 1 teaspoon olive oil
- ½ cup diced onions (frozen works perfectly)
- 1 pound lean ground beef (93% lean eliminates draining)
- 2-3 cloves minced garlic
- 1 teaspoon sugar (balances tomato acidity)
- 1 teaspoon Italian seasoning
- ¼ teaspoon red pepper flakes (optional)
- 1 jar (24 oz) pasta sauce
- 1 cup water (for rinsing jar)
- 2 cans (14.5 oz each) beef broth
- 1 pound mostaccioli pasta
- 2 cups shredded mozzarella, divided
Foolproof Step-by-Step Method
- Sauté base flavors: Heat olive oil on High sauté. Brown beef with onions and garlic until no pink remains—about 5 minutes.
- Build sauce foundation: Add sugar, Italian seasoning, pepper flakes, pasta sauce, water, and broth. Stir thoroughly to combine.
- Add pasta correctly: Scatter mostaccioli evenly across surface. Use spoon back to press pasta below liquid level—resist stirring.
- Pressure cook: Seal lid, set High pressure for 3 minutes. After cooking, natural release 3 minutes, then quick-release remaining pressure.
- Cheese crust finale: Stir pasta, fold in 1 cup mozzarella. Top with remaining cheese. Use broil function 5 minutes until golden and bubbly.
Pro tip: For extra crispy edges, let cheese rest 2 minutes after broiling before serving—this allows the crust to set properly.
Restaurant-Style Spaghetti with Roasted Garlic

This recipe elevates jarred sauce through roasted garlic and strategic layering. The roasted garlic melts into the sauce during pressure cooking, creating depth typically achieved through long simmering—no all-day cooking required.
Flavor Building Process
Start by roasting a whole garlic bulb: cut top, drizzle olive oil, wrap in foil, then bake at 325°F for 35 minutes. This transforms sharp raw garlic into sweet, caramelized cloves that dissolve into the sauce during pressure cooking. Don’t skip this step—it makes the difference between ordinary and extraordinary spaghetti.
Assembly Order for Maximum Flavor
- Sauté beef with onions, salt, basil, and Italian seasoning until nearly cooked
- Add diced peppers and roasted garlic cloves (squeeze from skins)
- Pour in diced tomatoes and 3 cups broth
- Rinse sauce jar with remaining 1 cup broth; pour into pot
- Layer spaghetti in criss-cross pattern
- Dollop tomato paste on surface—do not stir
The tomato paste acts as a thickener, dissolving during pressure cooking to create perfect sauce consistency without additional steps.
Quick Weeknight Pizza Pasta Fusion
Transform pizza night into a 15-minute meal using pantry staples. This ninja foodi pasta recipes favorite works with gluten-free pasta and scales easily for larger families, making it perfect for busy weeknights.
One-Pot Assembly for Perfect Pizza Pasta
Combine all ingredients except cheese: pasta, water, diced peppers, onions, olives, pepperoni, pizza sauce, tomato sauce, and seasoning. Ensure pasta is fully submerged before sealing—never add cheese before pressure cooking as it causes burn notices.
Pressure cook on High for 10 minutes for gluten-free rotini, quick-release immediately. Top with mozzarella and let residual heat melt cheese for creamy pizza pasta perfection.
Flavor Variations to Keep Dinner Exciting
- Supreme: Add sliced mushrooms and Italian sausage
- Hawaiian: Include pineapple chunks and Canadian bacon
- Vegetarian: Load with bell peppers, onions, mushrooms, and black olives
Tex-Mex Taco Pasta Fusion Recipe
This gluten-free option delivers bold taco flavors in comforting pasta form. Using lean ground beef eliminates draining, while taco seasoning provides complex spice without multiple jars—making it one of the simplest ninja foodi pasta recipes to prepare.
Cooking Sequence for Authentic Flavor
Brown beef directly in Foodi pot, no oil needed. Add taco seasoning, pasta, and water in that order. The seasoning distributes evenly during pressure cooking, infusing every noodle with Tex-Mex flavor.
Serving suggestion: Top with shredded lettuce, diced tomatoes, and a dollop of sour cream for loaded taco pasta experience. For best results, quick-release immediately after cooking to maintain pasta texture.
Storage and Reheating Secrets for Leftover Pasta
Refrigeration Guidelines That Maintain Quality
Cool pasta completely before transferring to airtight containers. Most ninja foodi pasta recipes keep 4 days refrigerated, with flavors intensifying overnight. The sauce thickens naturally—revive with 2-3 tablespoons broth or water when reheating.
Freezing Instructions for Meal Prep Success
Portion cooled pasta into freezer bags, removing excess air. Label with recipe name and date—most dishes freeze beautifully for 2 months. Thaw overnight in refrigerator, then reheat gently with added liquid.
Pro tip: Undercook pasta by 1 minute if planning to freeze, as it softens slightly during reheating—this prevents mushy texture in leftovers.
Common Ninja Foodi Pasta Pitfalls and Instant Fixes
Burn Notice Troubleshooting Guide
Problem: Foodi displays “BURN” before pressure builds
– Cause: Sauce too thick, pasta stuck to bottom, or inadequate liquid
– Fix: Add ½ cup broth, scrape bottom gently, ensure pasta isn’t clumped
Mushy Pasta Solutions That Save Dinner
Problem: Pasta overcooked and falling apart
– Cause: Natural release too long or stovetop time miscalculated
– Fix: Quick-release immediately after 2-minute natural release, use formula consistently
Sauce Separation Prevention Techniques
Problem: Creamy sauces break or appear curdled
– Cause: Adding dairy before pressure cooking
– Fix: Reserve cheese, cream, or sour cream for after pressure release, stirring in gradually
Master Your Next Pasta Night with Ninja Foodi
Your Ninja Foodi eliminates the pasta paradox—achieving restaurant quality with weeknight convenience. Start with these foundational ninja foodi pasta recipes, then experiment with your favorite flavor combinations. The technique remains constant: build flavor through sautéing, layer ingredients correctly, pressure cook using the timing formula, finish with broiling or stirring in delicate ingredients.
Keep these core principles handy: half the stovetop time for pressure cooking, always include thin liquid, never stir after adding pasta, and save cheese for the finale. With these secrets, you’ll transform basic ingredients into memorable meals that taste like they simmered all day.
Ready to expand beyond these classics? The same techniques apply to seafood scampi, creamy Alfredo, or hearty goulash. Your Foodi just became the hardest-working appliance in your kitchen—unlock its full potential with these ninja foodi pasta recipes that guarantee success every time.


