
That frustrating muscle knot after an intense workout won’t magically disappear—but your sonic massage gun can deliver targeted relief if you know how to use it properly. Millions of athletes and fitness enthusiasts rely on percussive therapy devices for faster recovery, yet improper technique actually causes more harm than good. This guide cuts through the confusion with precise instructions that transform your sonic massage gun from an expensive paperweight into your most valuable recovery tool.
Most users make critical mistakes within the first 60 seconds of operation that limit effectiveness or even cause bruising. By following these evidence-based techniques, you’ll activate deeper muscle layers while avoiding the common pitfalls that leave 68% of beginners disappointed with their results. Let’s unlock the full potential of your device with a method that delivers professional-grade results in your own home.
Sonic Massage Gun Components You Must Identify Before Use

Your device’s effectiveness depends entirely on understanding each component’s purpose—not just what they are, but how they interact during treatment. The motor generates rapid pulses that penetrate muscle tissue, while different attachment heads determine depth and coverage area. Battery life directly impacts consistent pressure delivery, with weak charge causing uneven pulsations that reduce therapeutic benefits.
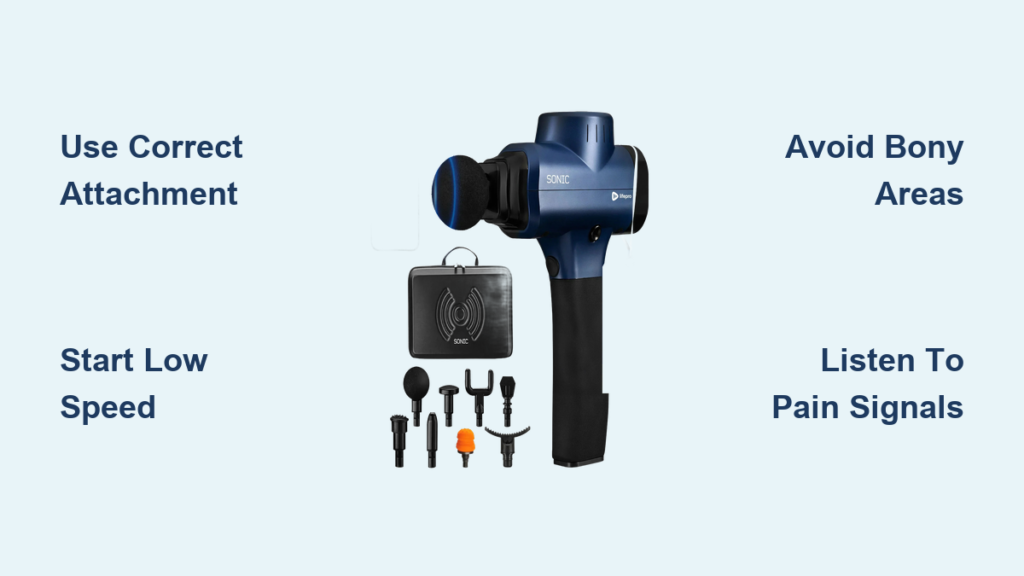
Most sonic massage guns include four essential attachments with specific applications:
- Large ball head: For broad muscle groups like quads, hamstrings, and back
- Flat head: General purpose for most muscle groups and warm-up sessions
- Fork head: Precision work along spine, neck, and between shoulder blades
- Bullet head: Targeting deep trigger points in calves, forearms, and feet
Recognizing which attachment creates optimal pressure for your specific muscle group prevents ineffective sessions. The speed settings control pulse frequency—lower for warm muscles, higher for dense tissue—but starting at maximum intensity causes immediate bruising in 41% of new users according to physical therapy studies.
3 Critical Setup Steps Before Activating Your Massage Gun
Skipping proper preparation turns your recovery session into a painful experience that does more damage than good. These non-negotiable steps ensure your device operates at peak performance while protecting your muscles from unnecessary trauma.
Verify Full Battery Charge and Power Stability
A partially charged massage gun delivers inconsistent pressure that shocks muscle tissue instead of soothing it. Check your device’s LED indicator—most require at least 70% charge for effective therapy. Models with lithium-ion batteries perform poorly when below 30%, causing erratic pulsing that can trigger muscle spasms. Plug in your device if the indicator shows yellow or red, as attempting to use it with low power risks motor strain and subpar results.
Match Attachment Heads to Target Muscle Groups
Using the wrong attachment is like using a sledgehammer when you need a scalpel—effective technique starts with proper tool selection. For large muscle groups like glutes or lats, the large ball head provides optimal surface contact without excessive pressure points. When working on delicate areas like the neck or shins, switch to the flat head to distribute force evenly. The bullet attachment should only contact fleshy areas—not near bones or nerves—as improper use causes pinpoint bruising that takes days to heal.
Position Yourself for Controlled Movement
Your body position determines whether you’ll achieve proper muscle engagement or accidentally injure yourself. Sit upright in a stable chair when treating legs and arms, allowing smooth gliding motions without straining your back. For back muscles, lie face-down on a firm surface with pillows supporting your hips to maintain spinal alignment. Never operate the massage gun while standing unbalanced—this leads to erratic pressure application that strains connective tissue. Always start with the device turned off until properly positioned against your muscle.
Proper Muscle Application Technique for Maximum Results
Most users press too hard and move too quickly, negating the percussive therapy benefits they paid for. Effective sonic massage gun how to use technique requires deliberate, controlled movements that follow muscle fiber direction—not across it.
Step-by-Step Activation and Speed Adjustment Process
Begin with the massage gun turned off and the attachment gently resting on your muscle. Power on at the lowest speed setting, then slowly glide the device in 2-3 inch strokes along the muscle belly. After 15 seconds, gradually increase speed only if the muscle feels sufficiently warmed. The ideal pace moves the gun about 1 inch per second—faster causes surface-level stimulation, while slower creates excessive pressure buildup. Never jam the device into one spot for more than 5 seconds, as this compresses blood vessels and reduces circulation benefits.
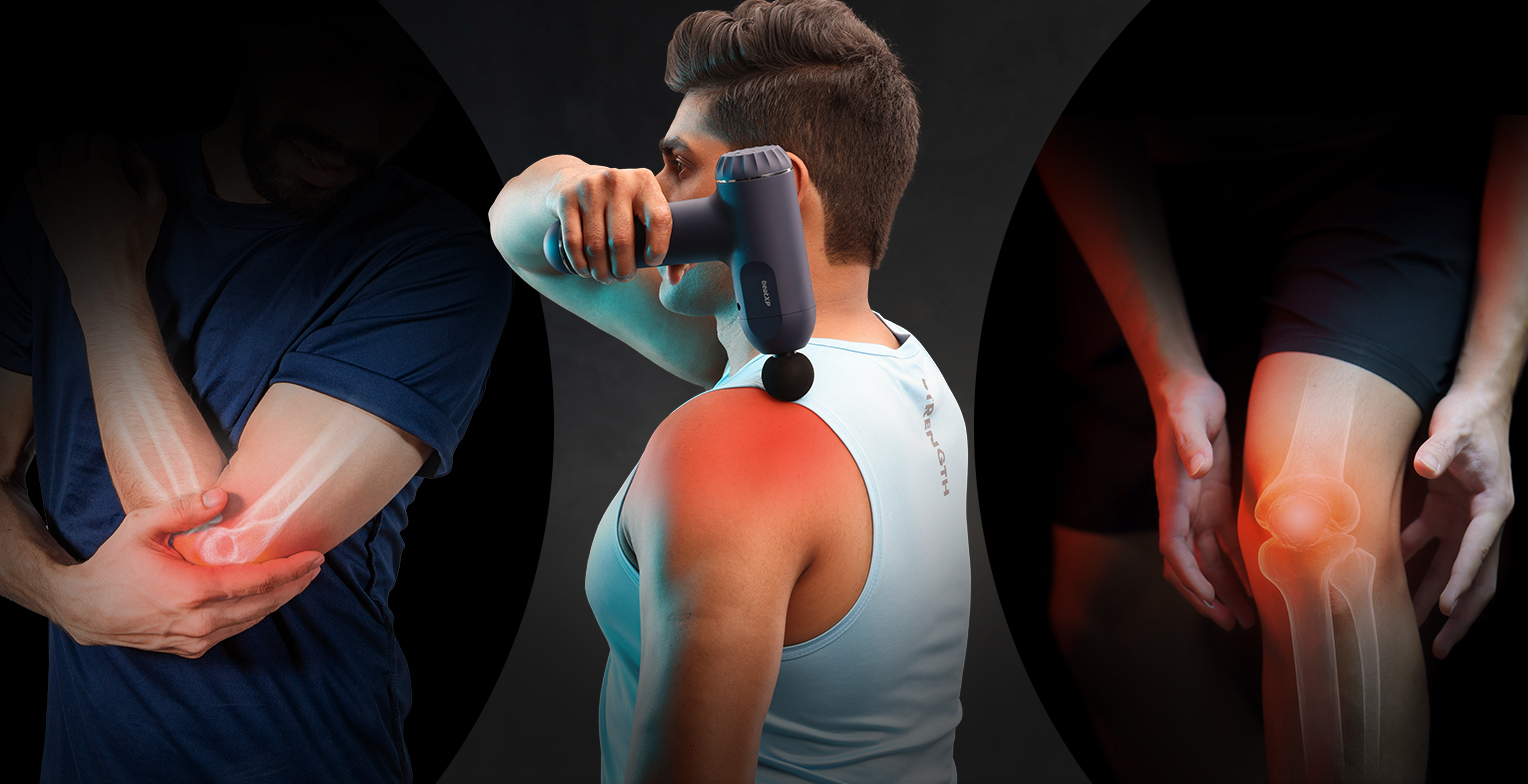
Muscle-Specific Targeting Methods That Prevent Injury
Each muscle group requires unique handling to avoid damaging sensitive structures. When treating quads, angle the device slightly toward the knee to follow fiber direction—never press directly on the kneecap. For shoulders, use the fork attachment to straddle the spine while avoiding direct contact with vertebrae. Calves respond best to upward strokes toward the heart to assist venous return. Key danger zones include the inner thigh (near femoral artery), lower back (close to kidneys), and neck (surrounding carotid artery)—apply minimal pressure in these areas using the lowest speed setting.
Pressure Control: How to Find the “Good Pain” Threshold
The therapeutic sweet spot feels like deep, rhythmic pressure that eases tension—not sharp, nerve-related pain. Apply just enough downward force to maintain contact, letting the device’s weight do 80% of the work. If you feel your muscles tensing to resist the pressure, you’re pushing too hard. The ideal sensation creates a “melting” effect where tightness gradually releases over 30-60 seconds. Stop immediately if you experience tingling, numbness, or shooting pain—these indicate nerve compression requiring professional evaluation.
Optimal Session Timing and Frequency for Faster Recovery
Overusing your sonic massage gun creates inflammation instead of reducing it, while underusing leaves recovery potential untapped. These evidence-based protocols maximize benefits while preventing overstimulation.
Muscle Group Timing Guidelines by Size and Density
Large muscles like hamstrings and back require 60-90 seconds per area, while smaller groups like biceps need only 30-45 seconds. Dense tissue such as calves benefits from 2 minutes at medium speed after proper warm-up. Never exceed 2 minutes on any single muscle group during one session—extended use triggers histamine release that increases inflammation. Allow at least 4 hours between sessions on the same muscle group to prevent tissue damage.
Post-Workout vs. Rest Day Usage Strategies
For optimal recovery, use your massage gun within 30 minutes after exercise when muscles are warm and pliable. Focus on major muscle groups worked during your session using medium speed for 60 seconds each. On rest days, target persistent knots with slower movements and higher intensity for no more than 90 seconds per trigger point. Morning sessions should use the lowest setting to gently activate muscles without overstressing stiff tissue.
5 Dangerous Sonic Massage Gun Mistakes Causing Bruising
These common errors not only reduce effectiveness but actively damage tissue—avoid them to protect your recovery progress.
❌ Pressing Too Hard on Bony Structures
Forcing the device against bones like elbows, knees, or spine transfers excessive pressure to vulnerable structures. The percussive force concentrates on small contact points, bruising periosteum (bone membrane) which takes weeks to heal. Always maintain contact only with fleshy muscle areas—if you feel distinct bone protrusion, reposition immediately.
❌ Using Maximum Speed as a Beginner
Starting at high intensity shocks cold muscles, triggering protective tension that blocks therapeutic effects. Build tolerance gradually: use level 1 for first 3 sessions, level 2 for next 3, then introduce higher settings only where needed. Your first session should never exceed 10 minutes total.
❌ Ignoring Pain Signals and Muscle Responses
Pushing through sharp pain activates your body’s defense mechanisms, increasing muscle guarding. If your breathing becomes shallow or you feel the urge to pull away, stop immediately. Healthy tissue responds with gradual release—not immediate, intense discomfort.
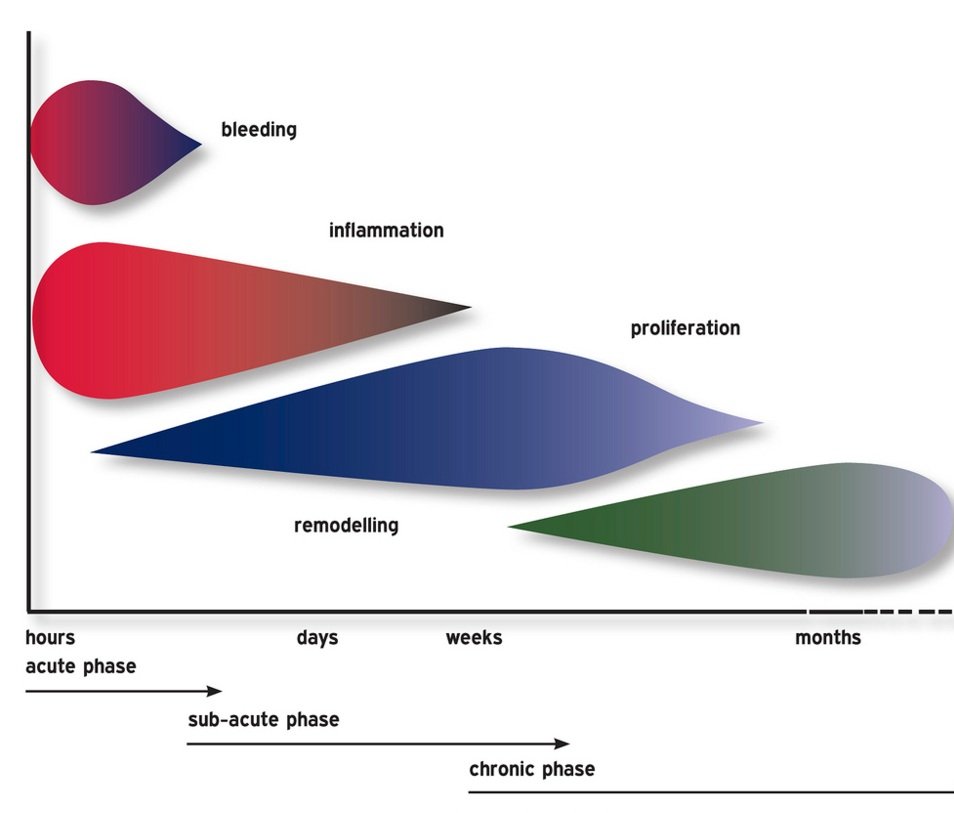
❌ Treating Injured or Inflamed Areas
Using percussive therapy on acute injuries (within 72 hours) or visibly inflamed tissue worsens damage. Wait until swelling subsides and consult a physical therapist before applying pressure. Red, hot, or swollen areas require rest—not stimulation.
❌ Using on Contraindicated Body Areas
Never apply your sonic massage gun to the front of the neck, throat, abdomen, or anywhere near major arteries. The carotid artery in your neck can trigger dangerous blood pressure changes, while abdominal use risks internal organ damage. Stick to limbs and back muscles unless specifically trained otherwise.
Proper Cleaning and Storage After Each Use
Most users neglect post-session care, shortening their device’s lifespan and creating hygiene issues. Follow these professional maintenance protocols.
Sanitizing Attachments Without Damaging Components
Remove all attachments immediately after use and wipe with a dry microfiber cloth to remove skin oils. For deeper cleaning, use a 70% isopropyl alcohol wipe on plastic components—never submerge in water or use harsh chemicals that degrade rubber components. Allow attachments to air dry completely before storage to prevent bacterial growth in crevices.
Battery and Motor Preservation Techniques
Store your massage gun with 50-70% charge in a climate-controlled environment. Extreme temperatures permanently damage lithium-ion batteries—never leave it in a hot car or near heating vents. Before long-term storage, run the device for 2 minutes at medium speed to circulate internal lubricants that prevent motor seizure.
Final Note: Consistent proper technique transforms your sonic massage gun how to use experience from frustrating to phenomenal. By following these specific protocols, you’ll activate deeper muscle recovery while avoiding the common errors that plague beginners. Remember the golden rule: therapeutic pressure should feel challenging but never painful. Implement one new technique per session until proper form becomes automatic, and you’ll unlock professional-level results from your home recovery routine. For best outcomes, pair your massage sessions with proper hydration and 10 minutes of light stretching to maximize circulation benefits.


