
That familiar blue glow from your Stinger bug zapper used to mean peaceful evenings on the patio. Now it sits dark while mosquitoes swarm freely around you. When your Stinger bug zapper not working symptom strikes—especially when the red sensor light stays on but the bulb won’t illuminate—it’s more than an annoyance; it’s a direct threat to your outdoor comfort. This troubleshooting guide cuts through the confusion with precise, actionable steps to diagnose why your unit won’t light, whether the fan runs or not. You’ll discover whether a $10 bulb swap will solve it or if replacement is smarter—saving you hours of frustration and wasted money on unnecessary parts.
Before touching a single screw, unplug your Stinger unit immediately. These devices contain lethal high-voltage grids capable of delivering 2,000+ volts—enough to cause severe injury or death. Never attempt internal inspections while plugged in, and never probe the zapping grid terminals. This guide focuses solely on the low-voltage lighting circuit where 95% of failures occur.
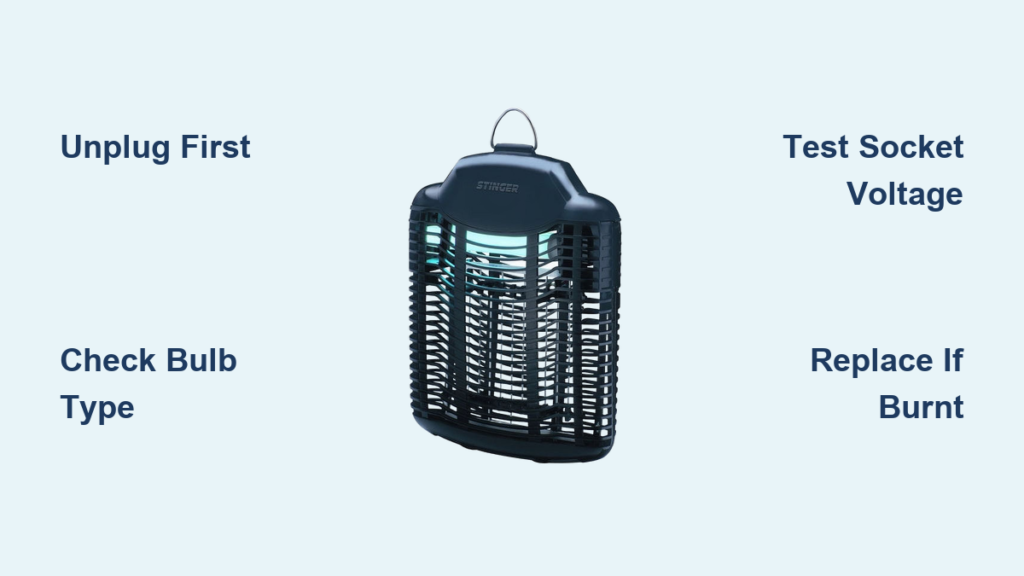
Critical Safety Steps for Stinger Bug Zapper Repairs
Working on a Stinger bug zapper not working issue demands strict safety protocols. One misstep could turn a simple fix into an emergency. These non-negotiable precautions protect you from electrical hazards and component damage.
Verify Complete Power Disconnection
Unplug the unit and wait 10 minutes before opening the housing. This allows capacitors to fully discharge residual high voltage. Confirm no power by checking that the red sensor light is completely off. If it remains illuminated, the internal circuitry may still be energized—stop immediately and replace the unit.
UV Bulb Handling Protocols
Never touch the glass surface of replacement bulbs with bare fingers. Skin oils create hot spots that cause premature failure. Always use microfiber cloths or nitrile gloves when installing the F15T8/BLB tube. If you accidentally touch the bulb, clean it thoroughly with isopropyl alcohol before installation.
Step 1: Eliminate Power Supply False Alarms
Over 30% of “dead” Stinger units actually suffer from simple power interruptions. Skip this step and you’ll waste time replacing perfectly good bulbs.
Test the Outlet with a Known-Working Device
Plug a lamp or phone charger into the same outlet. If it doesn’t power on, check your circuit breaker panel for tripped switches. Many outdoor outlets connect to GFCI (Ground Fault Circuit Interrupter) outlets—locate these (typically in garages or bathrooms) and press their “TEST” then “RESET” buttons. A single tripped GFCI can kill power to multiple outdoor circuits.
Bypass Extension Cords and Timers
Faulty extension cords cause frequent misdiagnosis. Plug the Stinger directly into the wall outlet. If it works, replace the cord—never splice or repair damaged cords on bug zappers. Similarly, remove any smart plugs or mechanical timers; these often fail internally while appearing functional.
Step 2: Diagnose the Black Light Bulb Failure
The UV bulb fails in 7 of 10 non-lighting Stinger units. But don’t replace it blindly—confirm the diagnosis first.
Perform the Bulb Swap Test
Remove the suspect F15T8/BLB tube and inspect its pins for corrosion or bending. Install a brand-new, verified-working 15W 18-inch BLB bulb (not a standard “bug light”). True BLB bulbs emit specific 365nm UVA wavelengths—critical for attracting insects. Standard blacklights won’t work. If the new bulb lights, your original was dead. If not, move to socket testing.
Clean Corroded Contacts Properly
Corrosion on socket contacts is common in humid climates. With the unit unplugged, dip a cotton swab in 90%+ isopropyl alcohol and scrub the metal contacts inside the socket. Let it dry completely. Gently bend any flattened socket tabs upward with needle-nose pliers to ensure firm bulb contact. Never use abrasive cleaners—they damage electrical contacts.
Step 3: Voltage Test the Bulb Socket Circuit
:strip_icc()/measuring-voltage-outlet-77726753-ac9266c6cc0c4b56bf0b663bedd85883.jpg)
When both light and fan fail simultaneously, you’re likely dealing with a shared circuit fault. This multimeter test identifies if power reaches the bulb socket.
Safe Voltage Measurement Procedure
WARNING: This involves live 120V AC. If uncomfortable, skip to replacement. With the bulb removed, plug in the unit. Set your multimeter to 200V AC. Carefully touch one probe to each metal contact in the empty socket—never let probes touch each other. You should read 110-120V. No voltage? The problem is upstream in the power circuit. Voltage present? The socket or wiring is faulty.
Interpret Fan Behavior Clues
Note whether the fan operates while testing:
– Fan runs but light is dead: Focus on bulb-specific components (ballast, starter)
– Both fan and light dead: Suspect main circuit board, fuse, or shared power rail
– Fan runs intermittently: Check for loose wiring connections near the motor
Step 4: Inspect Internal Wiring and Circuit Board Damage

Open the housing only after confirming complete power disconnection. Look for these telltale failure signs that explain why your Stinger bug zapper not working.
Identify Burnt Components Visually
Trace wires from the power cord to the circuit board. Look for:
– Charred insulation near solder joints
– Bulging or leaking capacitors (cylindrical components)
– Blackened resistors (small rectangular parts)
– A distinct “burnt electronics” smell
– A blown glass/ceramic fuse (often near power input)
Check Critical Connection Points
Inspect where wires connect to:
– Bulb socket terminals (loose spade connectors cause intermittent failure)
– Fan motor leads (vibration often breaks these)
– Circuit board solder joints (cold solder joints appear lumpy and dull)
– Power switch contacts (dirt causes high resistance)
Step 5: Identify Stinger-Specific Failure Points

Stinger units share common weak spots based on model year. Knowing these saves diagnostic time.
Magnetic Ballast vs. Electronic Ballast Failures
Older Stinger models (pre-2018) use magnetic ballasts with separate starters. If you hear a buzzing sound but no light, replace the starter (a small silver cylinder near the bulb). Newer units have integrated electronic ballasts—when these fail, the entire circuit board usually needs replacement.
The Hidden Thermal Fuse Risk
Many Stingers include a thermal fuse soldered to the circuit board that blows during overheating. Unlike standard fuses, these aren’t visible. If you find charring near the power input section, assume the thermal fuse is blown—but replacing it without fixing the root cause (like blocked ventilation) causes immediate re-failure.
When to Repair vs. Replace Your Non-Working Stinger
Don’t waste $25 on parts for a $35 unit. This decision tree cuts through the guesswork.
Repair Only If…
- The bulb replacement costs under $15 and fixes the issue
- You find only corroded socket contacts needing cleaning
- A visible fuse is blown (but only if no other damage exists)
- You’re skilled with soldering and can identify a single failed component
Replace Immediately If…
- The circuit board shows multiple burnt components
- The high-voltage grid has physical damage
- Your unit is over 3 years old (UV output degrades significantly)
- Repair costs exceed $20 (new units start at $35)
Exact Steps to Replace a Stinger Bug Zapper Bulb
This isn’t like changing a household light bulb—precision matters for UV effectiveness.
- Unplug and Wait: Disconnect power and wait 10 minutes for capacitor discharge.
- Open Housing: Remove 4-6 screws on the outer casing (usually Phillips #2).
- Remove Old Bulb: Rotate the tube 90 degrees counterclockwise while applying gentle outward pressure. Never force it.
- Install New Bulb: With gloved hands, align new F15T8/BLB pins with socket slots. Insert fully, then rotate 90 degrees clockwise until seated.
- Test Safely: Reassemble housing, plug in, and observe from 3+ feet away. A working bulb emits faint blue-purple light within 30 seconds.
Preventing Future “Stinger Bug Zapper Not Working” Issues
Proactive care extends UV bulb life and prevents 80% of electrical failures.
Seasonal Maintenance Checklist
- Monthly: Unplug and wipe exterior housing with damp cloth (never spray cleaners directly)
- Every 2 Months: Clean metal grid with soft brush to remove insect debris
- Before Storage: Replace bulb if over 12 months old (UV output degrades even if glowing)
- Off-Season: Store indoors in dry location—never leave outdoors year-round
Critical Bulb Replacement Timing
UV intensity drops 30-40% after 12 months. Replace bulbs annually even if still lighting. True BLB bulbs cost $8-$15 on Amazon—search “F15T8/BLB 18-inch” to avoid ineffective substitutes. Ace Hardware and True Value often stock them in-store.
Final Decision: Repair or Replace?
When your Stinger bug zapper not working leaves you swatting mosquitoes at 9 PM, prioritize speed and safety. Start with the $12 bulb swap—if it fails, check for obvious socket corrosion or wiring damage. But if the circuit board shows any charring or the fan is dead too, replacement is smarter than risking shock on a sub-$40 unit. A new Stinger with fresh UV output beats a temperamental repair. For most homeowners, that simple bulb replacement restores peaceful evenings within minutes—making this the fastest fix in pest control. Keep spare bulbs on hand, and you’ll never face another dark, bug-infested patio night.


