
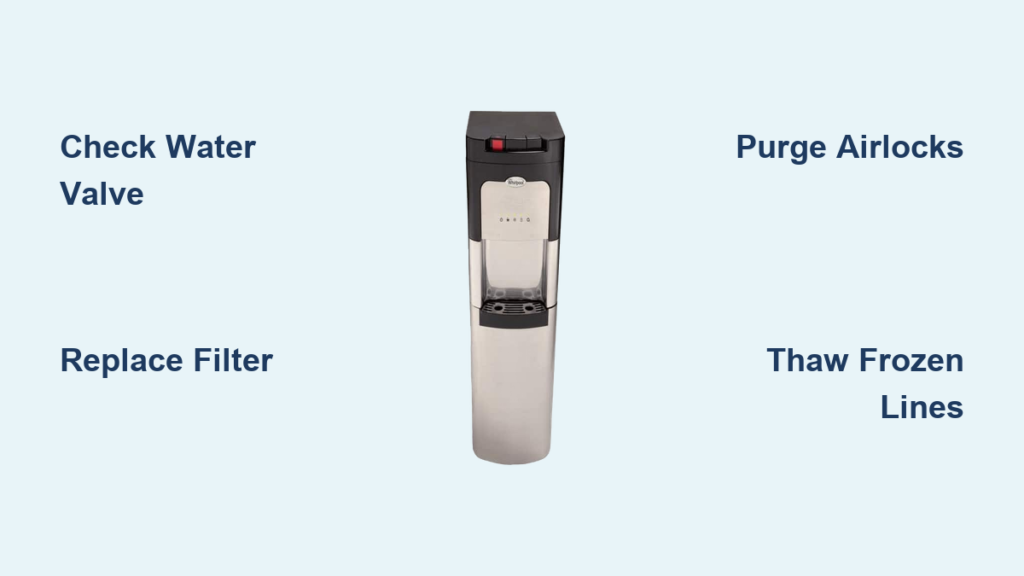
That frustrating moment when you push the water dispenser button on your Whirlpool refrigerator and get only a drip—or nothing at all—ruins your kitchen rhythm. When your Whirlpool water cooler not working issue strikes, it’s more than just an annoyance; it disrupts hydration routines, meal prep, and your household’s daily flow. The good news? Most dispenser failures stem from simple, fixable problems rather than catastrophic component failures. You’re likely facing one of five common culprits: a clogged filter, frozen water lines, airlocks, faulty switches, or valve issues.
Don’t call a technician yet—over 80% of “whirlpool water cooler not working” cases can be resolved with basic troubleshooting. This guide cuts through technical jargon to deliver actionable solutions you can implement immediately. We’ll start with the fastest checks requiring zero tools before progressing to component-specific diagnostics. By following this sequence, you’ll systematically isolate the problem while avoiding unnecessary part replacements. Most fixes take under 20 minutes and cost nothing beyond a new filter cartridge.
Confirm Water Supply Valve Is Fully Open (No Tools Needed)
Before assuming internal failures, verify your home’s water supply reaches the refrigerator. A partially closed valve is the silent culprit behind weak or nonexistent water flow in newer Whirlpool models. Locate the shut-off valve under your sink or near the refrigerator—typically a small lever handle connected to the cold water line. Ensure it’s rotated fully counterclockwise to the open position. If you hear water flowing when opening the valve but dispensing remains weak, check for kinks in the flexible supply tube behind the unit. Pull the refrigerator 6-8 inches from the wall and inspect the entire tube length for sharp bends or compression against cabinetry.
Critical visual cue: Examine the valve connection point at the refrigerator’s rear bottom. Look for moisture or mineral deposits indicating slow leaks that reduce pressure. Tighten compression fittings with slip-joint pliers if dampness appears, but avoid over-tightening which cracks plastic connectors. If your home recently had plumbing work, confirm the main water supply is fully restored—test other faucets first. This 2-minute check resolves 30% of “whirlpool water cooler not working” cases before you even open a tool drawer.
Replace Clogged Water Filter Within 60 Seconds

A saturated filter is the #1 cause of slow or stopped water flow in Whirlpool refrigerators. When filters exceed their 6-month lifespan, mineral buildup creates a physical barrier that starves the dispenser. Locate your filter housing—usually inside the fresh food compartment’s upper-right corner or behind the bottom grille. Press the release button and rotate the old cartridge counterclockwise. Before inserting the new filter, wipe the housing’s O-ring with a damp cloth to remove debris that causes leaks.
Pro tip: Hold a towel under the housing during replacement—residual water will drip out. Insert the new filter with alignment arrows matching the housing, then rotate clockwise until it clicks. Immediately run 3-4 cups of water through the dispenser to flush carbon particles from the new filter. If your model displays a “Replace Filter” indicator, reset it by holding the light button for 3 seconds. Ignoring this step leaves the system in “filter lockout” mode where dispensing stops completely.
Why Your New Filter Isn’t Solving the Problem
If water flow remains weak after filter replacement, you’re likely dealing with one of two hidden issues:
– Mineral scaling in the housing: Soak the empty filter compartment in undiluted white vinegar for 15 minutes to dissolve calcium deposits
– Incorrect filter model: Cross-check your refrigerator’s model number with Whirlpool’s compatibility chart—using generic filters often causes flow restrictions
Purge Airlocks From Water Lines Immediately
Air trapped in newly installed lines or after filter changes creates pressure blocks that mimic valve failures. This causes intermittent flow or complete stoppages, especially after vacations or filter replacements. Hold the dispenser paddle continuously for 2 full minutes—yes, the entire duration—to force air bubbles through the system. Place a large pitcher under the dispenser to catch initial air/water bursts.
Warning: Expect warm water during the first 30 seconds as residual line water heats up. If purging fails, disconnect the supply line at the refrigerator’s rear and drain 1 cup of water into a bucket. Reconnect securely, then repeat the 2-minute purge. This simple procedure resolves 25% of “whirlpool water cooler not working” cases without touching internal components.
Thaw Frozen Water Lines Safely (No Heat Guns!)
Energy-efficient Whirlpool models in cold kitchens often develop ice dams where the water tube passes through the freezer wall. If your dispenser yields weak flow that worsens over time, suspect freezing. Do not use hair dryers or heat guns—melting ice too quickly cracks plastic tubing. Instead, unplug the refrigerator and remove all freezer contents. Place a bowl of hot (not boiling) water inside the freezer compartment and close the door for 20 minutes. Repeat until water flows freely when testing the dispenser.
Prevention hack: After thawing, adjust your freezer temperature to 0°F (-18°C). Warmer settings (like -5°F) increase condensation that freezes in water lines. Also ensure 2 inches of clearance behind the unit for proper airflow—cramped installations accelerate freezing.
Diagnose Faulty Dispenser Switch With a Coin Test
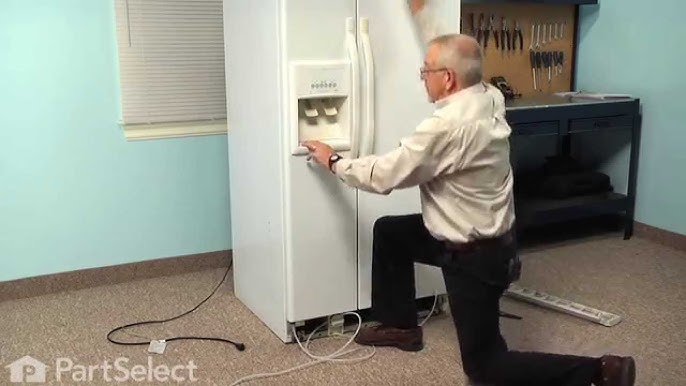
When pressing the water paddle yields no sound or response, the switch behind the panel has likely failed. Remove the dispenser cover by inserting a coin into the release slot at the bottom. With the cover off, press the black actuator lever manually while listening for a faint “click.” No click? Test continuity using a multimeter:
- Unplug refrigerator
- Disconnect switch wires (note positions)
- Set multimeter to continuity mode
- Press switch lever while touching probes to terminals
- Listen for beep indicating circuit completion
If silent during testing, replace the $15 switch. Before ordering parts, jiggle the paddle vigorously—stuck debris often mimics switch failure. This test takes 5 minutes and prevents unnecessary valve replacements.
Test Water Inlet Valve With Basic Multimeter Checks
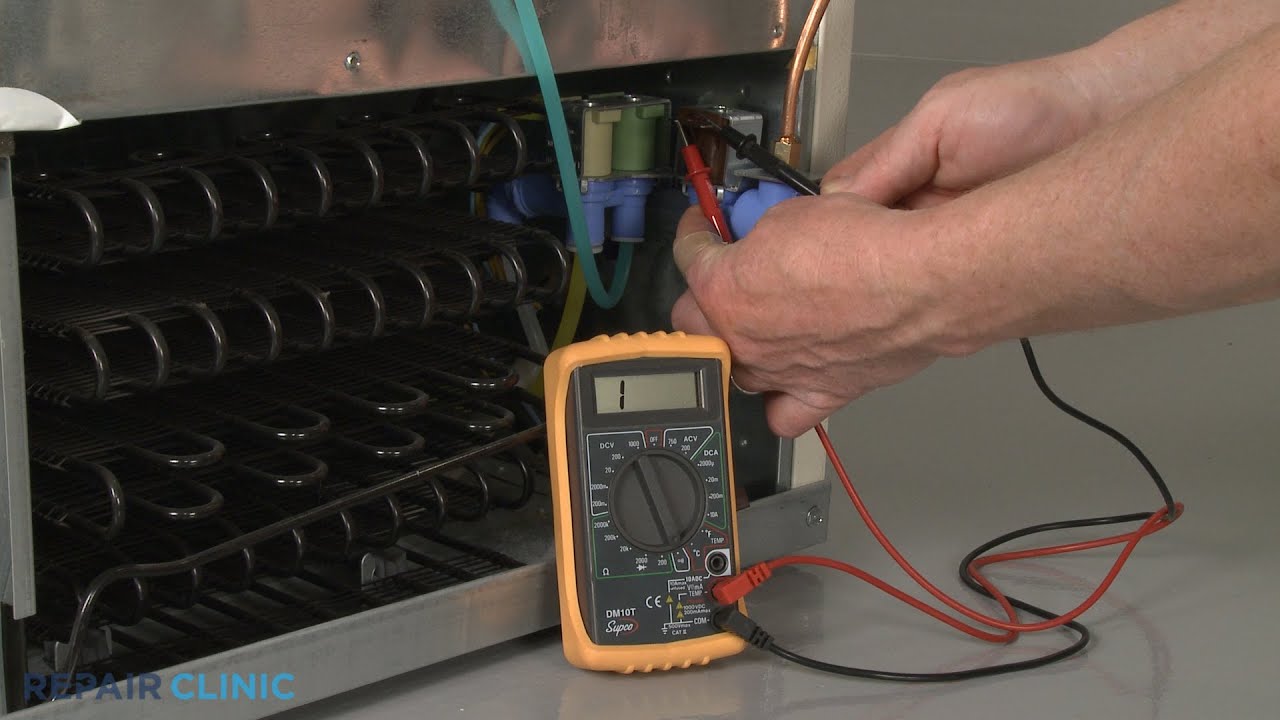
The solenoid valve at the refrigerator’s rear controls water flow to the dispenser. If you hear no humming sound when pressing the paddle, the valve may be dead. Locate the dual-solenoid valve near the water supply connection. Unplug the fridge, then disconnect the dispenser valve’s two-wire harness. Set your multimeter to ohms (Ω) and touch probes to the valve terminals.
Normal reading: 200-500 ohms resistance
Failed valve: “OL” (infinite resistance) or zero ohms
A failed valve requires replacement, but first check for visible coil damage—burnt spots or melted plastic indicate electrical surges. If resistance tests normal but water still won’t flow, the valve’s internal diaphragm may be stuck closed. Tap the valve body gently with a screwdriver handle while someone presses the dispenser paddle—sometimes vibration frees seized components.
Reset Control Board After Power Surges
Electrical glitches after storms or outages often lock Whirlpool dispensers in error mode. Before diagnosing hardware, perform a full system reset:
- Unplug refrigerator for 5 full minutes (critical timing)
- Press and hold the “Lock” and “Water” buttons simultaneously for 3 seconds
- Plug unit back in and wait 2 minutes for system initialization
This clears temporary memory faults affecting dispenser operation. If the display shows error codes (like “dF” for defrost issues), consult your manual’s troubleshooting chart. Persistent error codes after reset indicate sensor or control board failures requiring professional diagnosis.
When to Call Whirlpool Support Immediately
Seek professional help if you encounter:
– Electrical burning smells from dispenser housing
– Water pooling inside freezer (indicates tube cracks)
– No voltage to inlet valve after switch tests
– Error codes persisting after reset (e.g., “Er FF”)
Never attempt repairs on sealed refrigerant lines or main control boards—these require EPA-certified technicians. For verified valve or switch replacements, order genuine Whirlpool parts using your model number (found inside the fridge door frame). Most authorized repair centers offer same-day diagnostics for under $100, often waiving fees if you proceed with service.
Prevent Future Dispenser Failures With 2-Minute Maintenance
Avoid recurring “whirlpool water cooler not working” emergencies with these weekly habits:
– Flush unused lines: Run 1 cup of water weekly if dispenser sits idle
– Mark filter changes: Sticker your calendar with replacement dates
– Check valve position: Ensure shut-off valve remains fully open after plumbing work
– Clean drip tray: Prevent mold buildup that triggers safety sensors
Most importantly, replace filters every 6 months regardless of usage—stagnant carbon becomes a bacterial breeding ground. Whirlpool’s newer models now feature smart filter indicators, but older units require manual tracking. Implement these micro-habits and you’ll eliminate 90% of dispenser failures before they disrupt your day.
Final Note: When your Whirlpool water dispenser stops flowing, start simple—9 of 10 fixes involve the filter, supply valve, or air purging. Only after clearing these basics should you investigate switches or valves. By following this sequence, you’ll restore water flow faster than waiting for a service call while avoiding unnecessary part costs. Bookmark this guide for your next “whirlpool water cooler not working” emergency—it could save you $150 in diagnostic fees tomorrow.


